Change schools

FUN and Easy Fourth of July Food!

The Fourth of July is almost here! If you’re looking for some easy, fun, yet patriotic treats to celebrate the big day, (or any day throughout the month of July), look no further!  We have you covered with some tasty treats and oh-so perfectly  patriotic drinks sure to kick start your celebrations!


Red White and Blue 4th of July Rocket Hot Dogs

Rocket Dogs! 

Celebrate the birth of America with a little firework food! These rocket dogs use three simple food ingredients: hot dogs, crescent rolls cut in strips and marbled Monterrey Jack cheese cut into triangles! Add in the sticks and the patriotic cup cake wrappers and you’ve got an edible rocket! Easy peasy! 

Red, White and Blue Rice Krispie treats for the 4th of July and Memorial Day bbq's!

Red, White and Blue Firecracker Krispies 

These super easy treats are sure to be a big hit this summer! If you don’t have time to make your own Rice Krispie Treats, simply buy them pre-made, grab some Wilton’s candy melts in the color you need and go to town! You can find more about this awesome dessert on www.lifelovesugar.com

Recipes - Fourth of July Dipped Pretzels at createcraftlove.com


Patriotic Pretzel Wands! 

Not only are these pretzel wands created by createcraftlove.com super yummy, but they make an adorable table center piece to your upcoming Fourth of July or summer picnic! Dipping pretzel wands happens to be a family favorite activity over at our house so these will be top on the list this Fourth of July!  Not only are they easy, but you can make several mason jars filled with them to hand out as treats during a Fourth of July or summer get-together! Yay! 

Just need star cookie cutter! Slice watermelon and cut star shapes out of them for a beautifully festive fruit salad. | 31 Last-Minute Fourth Of July Decorating Tricks

Fabulously Fruity Fourth! 

Have your kids seeing stars while enjoying some summer time fruit! Cut out some water melon, then, with a star cookie cutter, shape out some adorable stars while adding in some blueberries and you’ve got the perfect mix of fabulously fruity patriotic perfection!   Whole watermelons just happen to be on sale at most grocery stores this time of year…so get your melon on! 


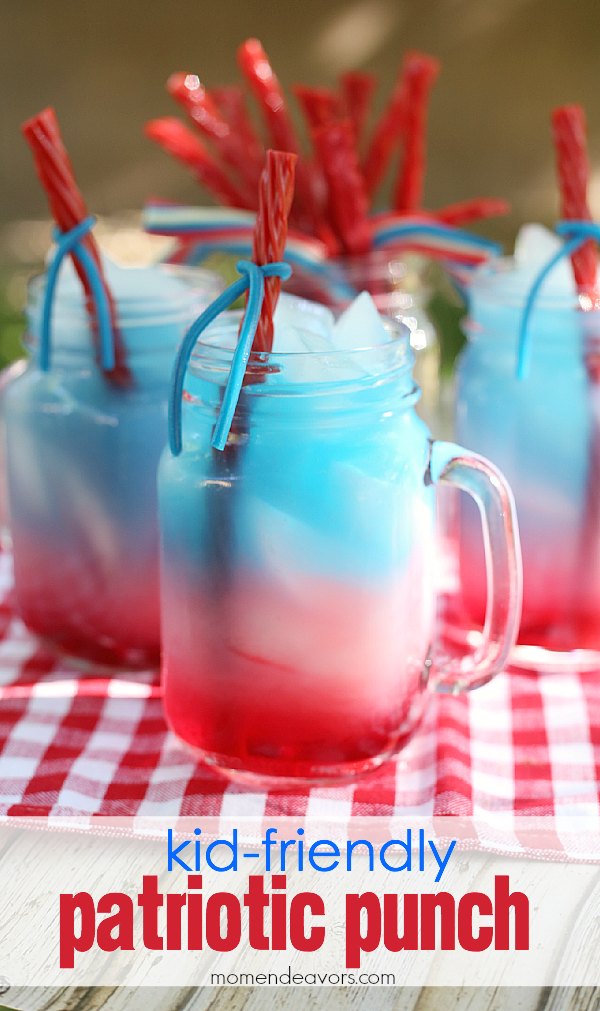
kid-friendly patriotic punch

Kids Red, White and Blue Patriotic Punch! 


This is one of my favorite ideas yet! The creation of this awesome drink takes a little bit of some “kitchen science” as our source, momendevors, puts it…but honestly, it’s all in the sugar content. Start by adding the juice with the highest sugar content first (red juice was the highest in this recipe) and use ice as a buffer. Grab the next juice with the second to highest sugar count, buffer with ice and repeat with the last color!

If you need something a bit quicker and more straight forward….here’s another recipe that looked equally as yummy…but might be a little more straight forward from www.eatingonadime.com

How to make Red, White, and Blue Drink

Kids Patriotic Punch!


Red, White, and Blue Vodka Lemonade Slush!  Yummm! Adult Fourth of July fun!


Frozen Firecracker Drinks: Vodka Lemonade Slush-YUM!

Why should the kiddos have all of the fun this Fourth of July? This awesome concoction is one my husband and I are gearing up to try on Wednesday! Oh, and no, they aren’t layered in correct red, white and blue order…something to do with the the thickness of each ingredient…but,gotta say, it looks like pure YUM. The vodka is actually mixed in at the end into the lemonade mixture, while grenadine (for the red) and blue curacao (for the blue) are combined with ice. 

We’ve decided to try it this way: Try this: Add red Gatorade with ice and repeat with blue Gatorade and ice to make your slush combo. We’re trying it today..will let you know how it goes! 

Another little side note, we figured we would add a little distinction between our Firecracker drinks and the kiddos Patriotic Punch by putting labels on our cups and NOT adding Twizzlers to ours! 


Whether you’re celebrating the birthday of the United States or you’re simply celebrating summer, these quick ideas will have you ready for the fireworks way before the sunsets! 


Happy Birthday America and Happy Summer to all! 

The BEST Valentine’s Day Activities for Kids!


Like many of us, I’m a BIG fan of Pinterest. 

I TRY everything I can on that platform–(emphasis on the TRY!)

Well, let me rephrase that.

I TRY everything I can possibly fit into my day/week that focuses on kid’s activities, crafts and learning on Pinterest. Ah. There. Better! 

I like to think of myself as fairly crafty but I will also tell you, NOT everything we do looks as “Martha Stewart” pretty as it does on Pinterest (hence the popularity of #pinterestfails!) 

From all of these imperfect Pinterest executions, I found the best activities for kids for Valentine’s Day!

The secret decoder one is definitely what I would deem as an imperfectly perfect pin execution of ours and the other activity…is just adorable! 

Either way, your kiddos are sure to L-O-V-E these activities! 

Even if they’re NOT as “Pinterest pretty” as you would like…no worries! Kiddos are making them…NOT our Cricket machines! 

I guarantee that they will remember the feeling from creating them with you than anything else! 

Now on to some awesomely creative Valentine’s Day activities! 

Secret Decoder Valentine’s Messages 

Secret Message Valentine @amandaformaro Crafts by Amanda

Picture Credit: CraftsbyAmanda 

This activity was an absolute FAVORITE last year and I can’t wait to start it up again this weekend! 

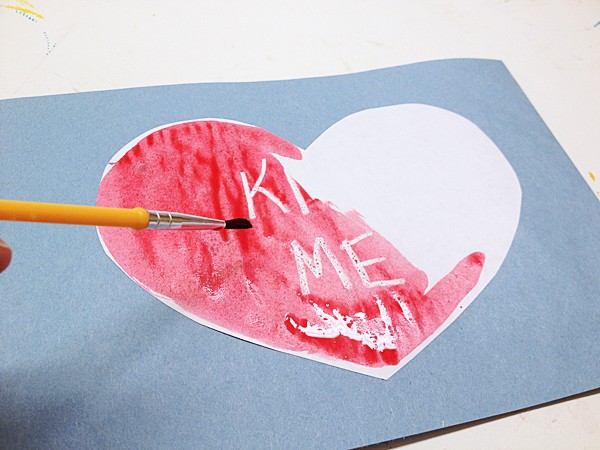
We created special secret decoder Valentine’s messages every day leading up to (and after) Valentine’s Day for each of our kids.

Every morning in February, they would wake up to find a new heart taped to their door with a secret message on it for them to decode. 

The messages focused on why we love them each so much. 

This activity is not only fun, but it’s an awesome way to hone in on why you love your kiddos so much and to emphasize those reasons with them.

I also did this with my hubby–it was pretty awesome! **Side note there**

I MUST admit, it really helped me to focus on those little reasons why I love my hubby so much.

Let’s face it, on any given busy, blurry day, it’s hard to think about how much you love it when your partner simply looks at you and smiles.

Below are all of the details on this adorable Valentine’s activity:

Here’s what you need:

1. White Crayon

2. Cardstock or plain white paper (hint: wax crayon sticks better to cardstock)

3. Scissors

4. Tape

5. Watercolor paint (ONLY) or Markers! (Lighter colors are best!)

Suggestions on How to Create and Execute this Activity: 

1.After your little loves go to sleep (or whenever it’s best for you!) create your secret Valentine’s hearts by cutting out any size heart shape you would like! 

2. Take a white crayon and write your secret message on cardstock paper.

I focused on specific things they do and things about their personalities that make them unique~ (why I love them so)~

i.e. their laughter, a time when they were generous, how they help out around the house, a special trait like how well they read, draw, play a sport, etc. 

I usually start my heart messages out with “We love how you…”

I also created these for my husband which we loved exchanging back and forth!   “We love how much you always make certain that everyone is happy”.

2. Hang them up on your little love’s doors for them to take down when they wake up!  

They will LOVE waking up every morning to decode a new secret message! 

The Running Mama Valentine's Day secret messages

Best Valentine’s Day Activities! Decoding the messages is so much fun!

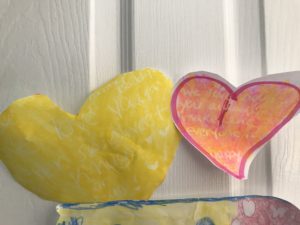
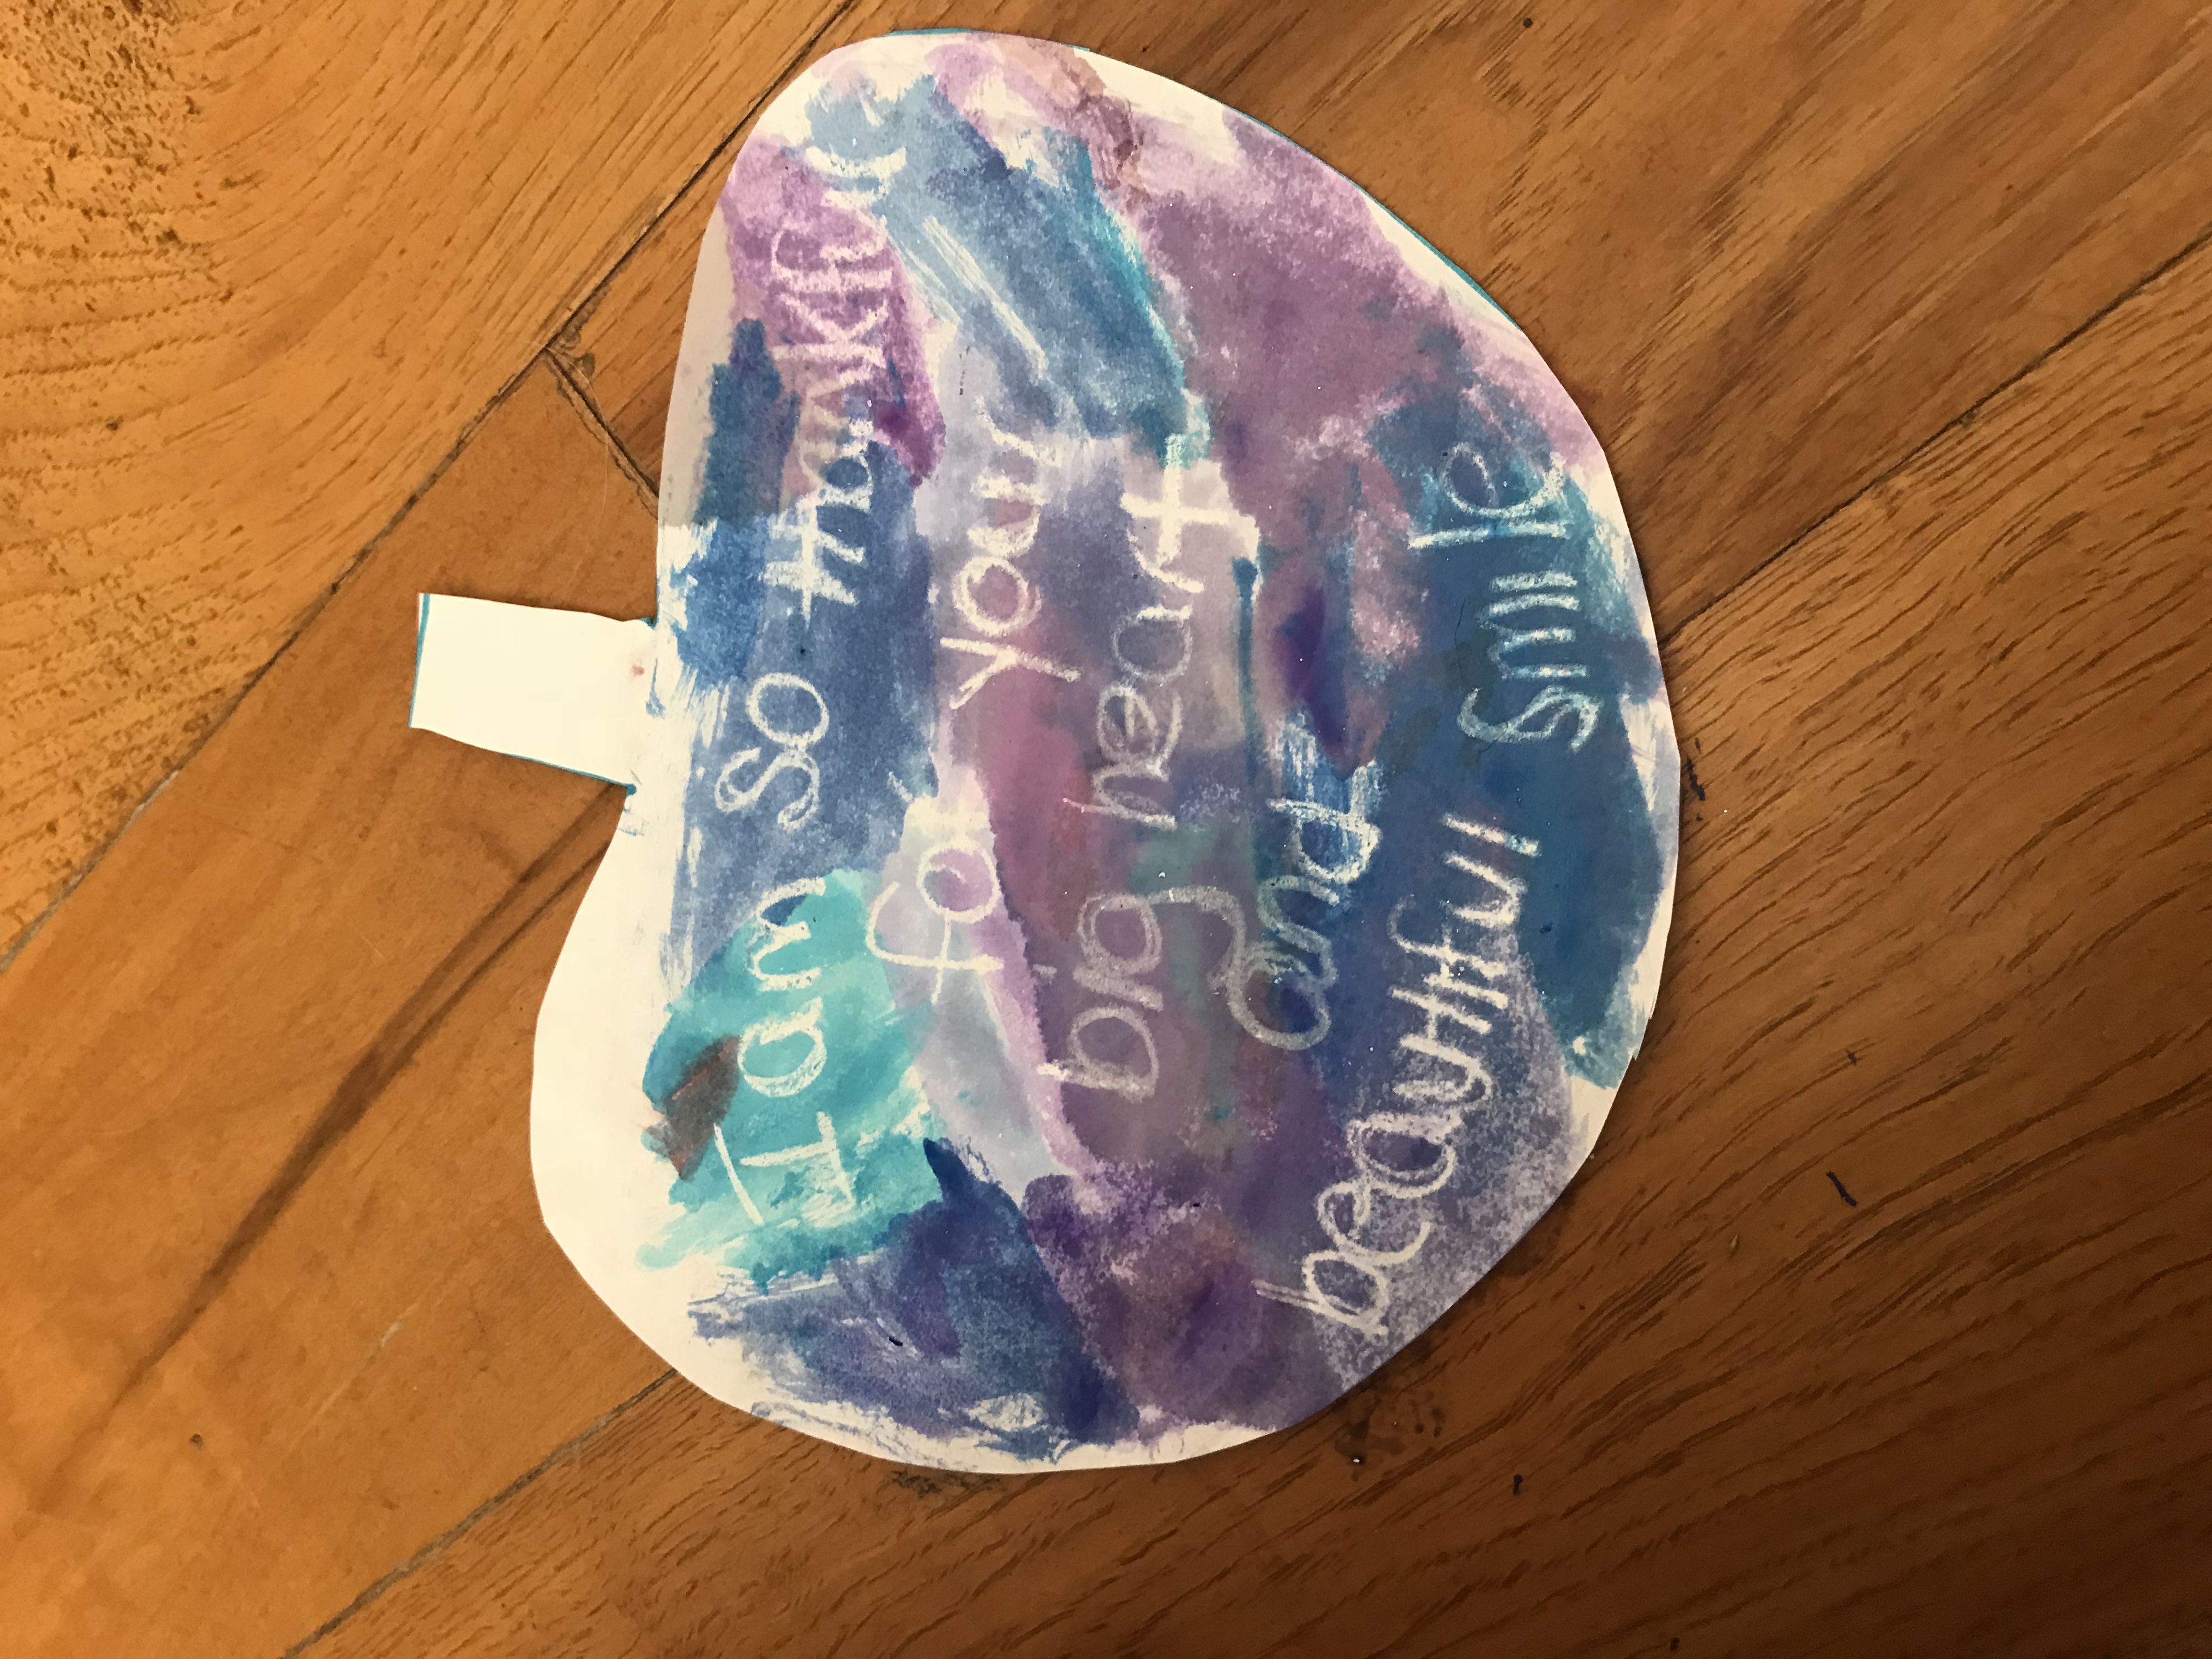
Here’s an up-close view of our hearts from last year! We are using watercolors this year! 

Valentine's Day secret messages The Running Mama

Our perfectly imperfect pin execution!

Bonus Learning Opportunity: This adorable Valentine’s Day activity turned into a discussion about how wax is resistant to the watercolor in markers.

Such a great time!

Valentine's Day secret messages The Running Mama

On our daughter’s door: secret messages stating why we love her.

Our daughter loved this Valentine’s activity so much that she made one for her daddy and I. It reads: Mommy and Daddy, I love making crafts together”.

Valentine's Day Secret Messages The Running Mama

Valentines for All! Our daughter making her own for us…adorable.

                         Valentine’s Day Scavenger Hunt 

The Running Mama Valentine's Day Scavenger Hunt Clues

Hunt your way through Valentine’s Day!

Another fun way to celebrate Valentine’s Day is with a scavenger hunt…complete with clues!

This adorable scavenger hunt is easy to print up, cut out and set up around your home. 

Use all of the clues or choose only four (depending on how you’re feeling)! 

Last year, I did an activity without ANY preparation last year. 

I printed these ON Valentine’s Day…that’s how forward thinking I was–HA! 

But on a positive note…it gives you a good idea of how quick and easy this can be. 

Don’t have prizes ready? No problem! Throw a bag of fruit snacks, a heart-shaped donut, a special note, or print up free coloring pages at the end! 

Your kiddos will just be THRILLED to run around the house looking for that extra special Valentine’s Day Surprise! 

Have fun with these Valentine’s Day Activities!

Sharing is Caring-we would love to know about your favorite Valentine’s Day Activities! Share below!  

Want some other awesome printables? Check these freebies out! 

Swing into the Christmas Season with EASY DIY Decor Fun for you and the Kiddos!

DSCN8459

DIY holiday home decor that EVERYONE can make!

Create your Own Wreaths!

If you’re like us, you might have already supported your local farm or Boy Scout Troop this past weekend by purchasing some awesome wreaths. 

However, for those of us who would rather put that money to some other charitable cause or even to your own gift-giving budget, I quite accidentally discovered one awesome way to trim some cost all while trimming the tree this Christmas!

It was Small Business Saturday last weekend and what better way to support local than grabbing a tree at your local tree farm?

We have the best farm not too far from our home and the kids just love zig-zagging through all of their amazing trees!

After some fun running around at the tree farm, we got home with our newly picked treasure of a tree, (it’s by far the “furriest” and softest Christmas tree we’ve ever cut down-see below!) and our kiddos could not WAIT to get it inside-(can’t blame them–it’s so exciting!).

2017 Furry Christmas Tree!

Our “furry” Christmas Tree!

As our kids were anxiously watching their daddy cut the branches, (I could feel their excitement bubbling as they patiently waited for the tree to move its way into our home), their “Oma” was over, (that’s what our kiddos call my husband’s mom-adorable), to partake in some of the afternoon fun.

She was also there to play with the kiddos so that mommy and daddy could extend our family fun day into a date night just for us (oh what fun!).

As she was collecting branches she asked to take some home to use in creating her own wreath.

How MUCH FUN! She then shared with us the most wonderfully simple idea that our “littles” could enjoy too…

DIY Wreath Instructions!

I’m not sure what it is about wreath making but prior to this adventure, I was slightly intimidated by the thought of creating my own.

I mean all those wires, adding the right decor etc.

However, this wreath is absolutely awesome!

  • SUPER cheap (you can make it with EVERYTHING  from our very own yard…aka-free, free, FREE)
  • The kiddos can make it with you– WIN, WIN, WIN!

Materials:

(contains affiliate sites–for more on that click here)

Here’s all you need to create your own beautiful wreath with items right from your yard!

  • Any type of evergreen branches. If you have a Christmas tree–use the trimmings from that!
  • A foam or fake wreath (check out some examples listed above or click here!

  • Pine cones if you have them! Have some extra fun and go pine-cone hunting outside with your kids! Grab a bag and get moving or go for a hike searching for them! (RUN MAMA!)
  • If you have a “bird berry bush”, (a very unofficial name for this plant…not a plant expert by any means!), or maybe a Holly plant outside sprouting those beautiful red berries, grab a few branches to add to your wreath! 
  • Got ribbon? Gather some or any type of crafting materials you would like to add to the wreath to decorate it! It’s really up to you! Get creative and go, go, GO!
  • Glue gun* only necessary if your items don’t have any long branches or other ways of attaching into the artificial wreath.

I have a glue gun similar to this one and I love it–check it out on Amazon here.

Simple DIY Steps:

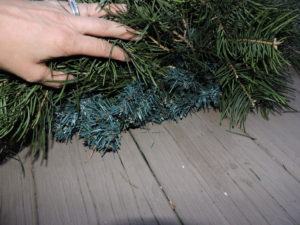
Step One: Take the branches of greens and insert them around the wreath. Depending on how full your branches are you may need more or less to cover the artificial wreath.

Step Two: Using pine cones, berries or other decorative items around your home, insert the items around the wreath. You may or may not need a hot gun to hold certain items into place.

Wrap it up!

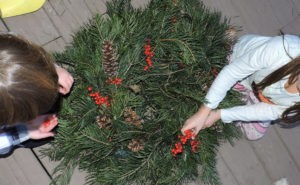
You can honestly add anything you want (or your kids want) to your wreath! The one shown is what my kids made with their “Oma”-it was adorable, simple, and they pulled it all together right from our yard!

Most of all, just have fun with this no pressure DIY decor!


Artificial wreath acts as a canvas for your real greens! (so great)


DIY Wreath for all

So fun adding the berries from our yard into this wreath! Our little guy enjoyed taking them off and throwing them on-lol.

Completed! DIY AWESOMENESS!


Wait~There’s More! 

Are you looking to write a blog post but aren’t certain where to find your next guest posting spot?

Look NO further! The Running Mama is looking for you! We would love posts about:

  • Organizing for the New Year
  • Your balancing act as a mama
  • Advice to new mamas

PLUS more! Click here to find out more or simply send us an email and let’s collaborate! therunningmama5@gmail.com 

Teaching Gratitude!

7 Simple Ways to Teach Gratitude this Thanksgiving!

Looking for ways to teach your kiddos what it means to have gratitude? This time of year is certainly a trigger for chatting about the many blessings we all have. 

Like many of you mamas out there, life in our house just gets BUSY.  

Taking the time to simply pause and reflect on what we’re truly grateful for definitely takes a minute or two–especially when your spinning 50 plates on your hands all at once…while talking on the phone to the dentist! 

No worries!

Below are some fun, ADORABLY simple ways we’ve found to help your kids focus on more than just talking turkey this upcoming holiday season.

50851AC6-EDB2-445E-99FE-9C960A3A0EE7.jpeg

SourceThe Moffatt Girls

There are affiliate links below* You can check out what that means here.

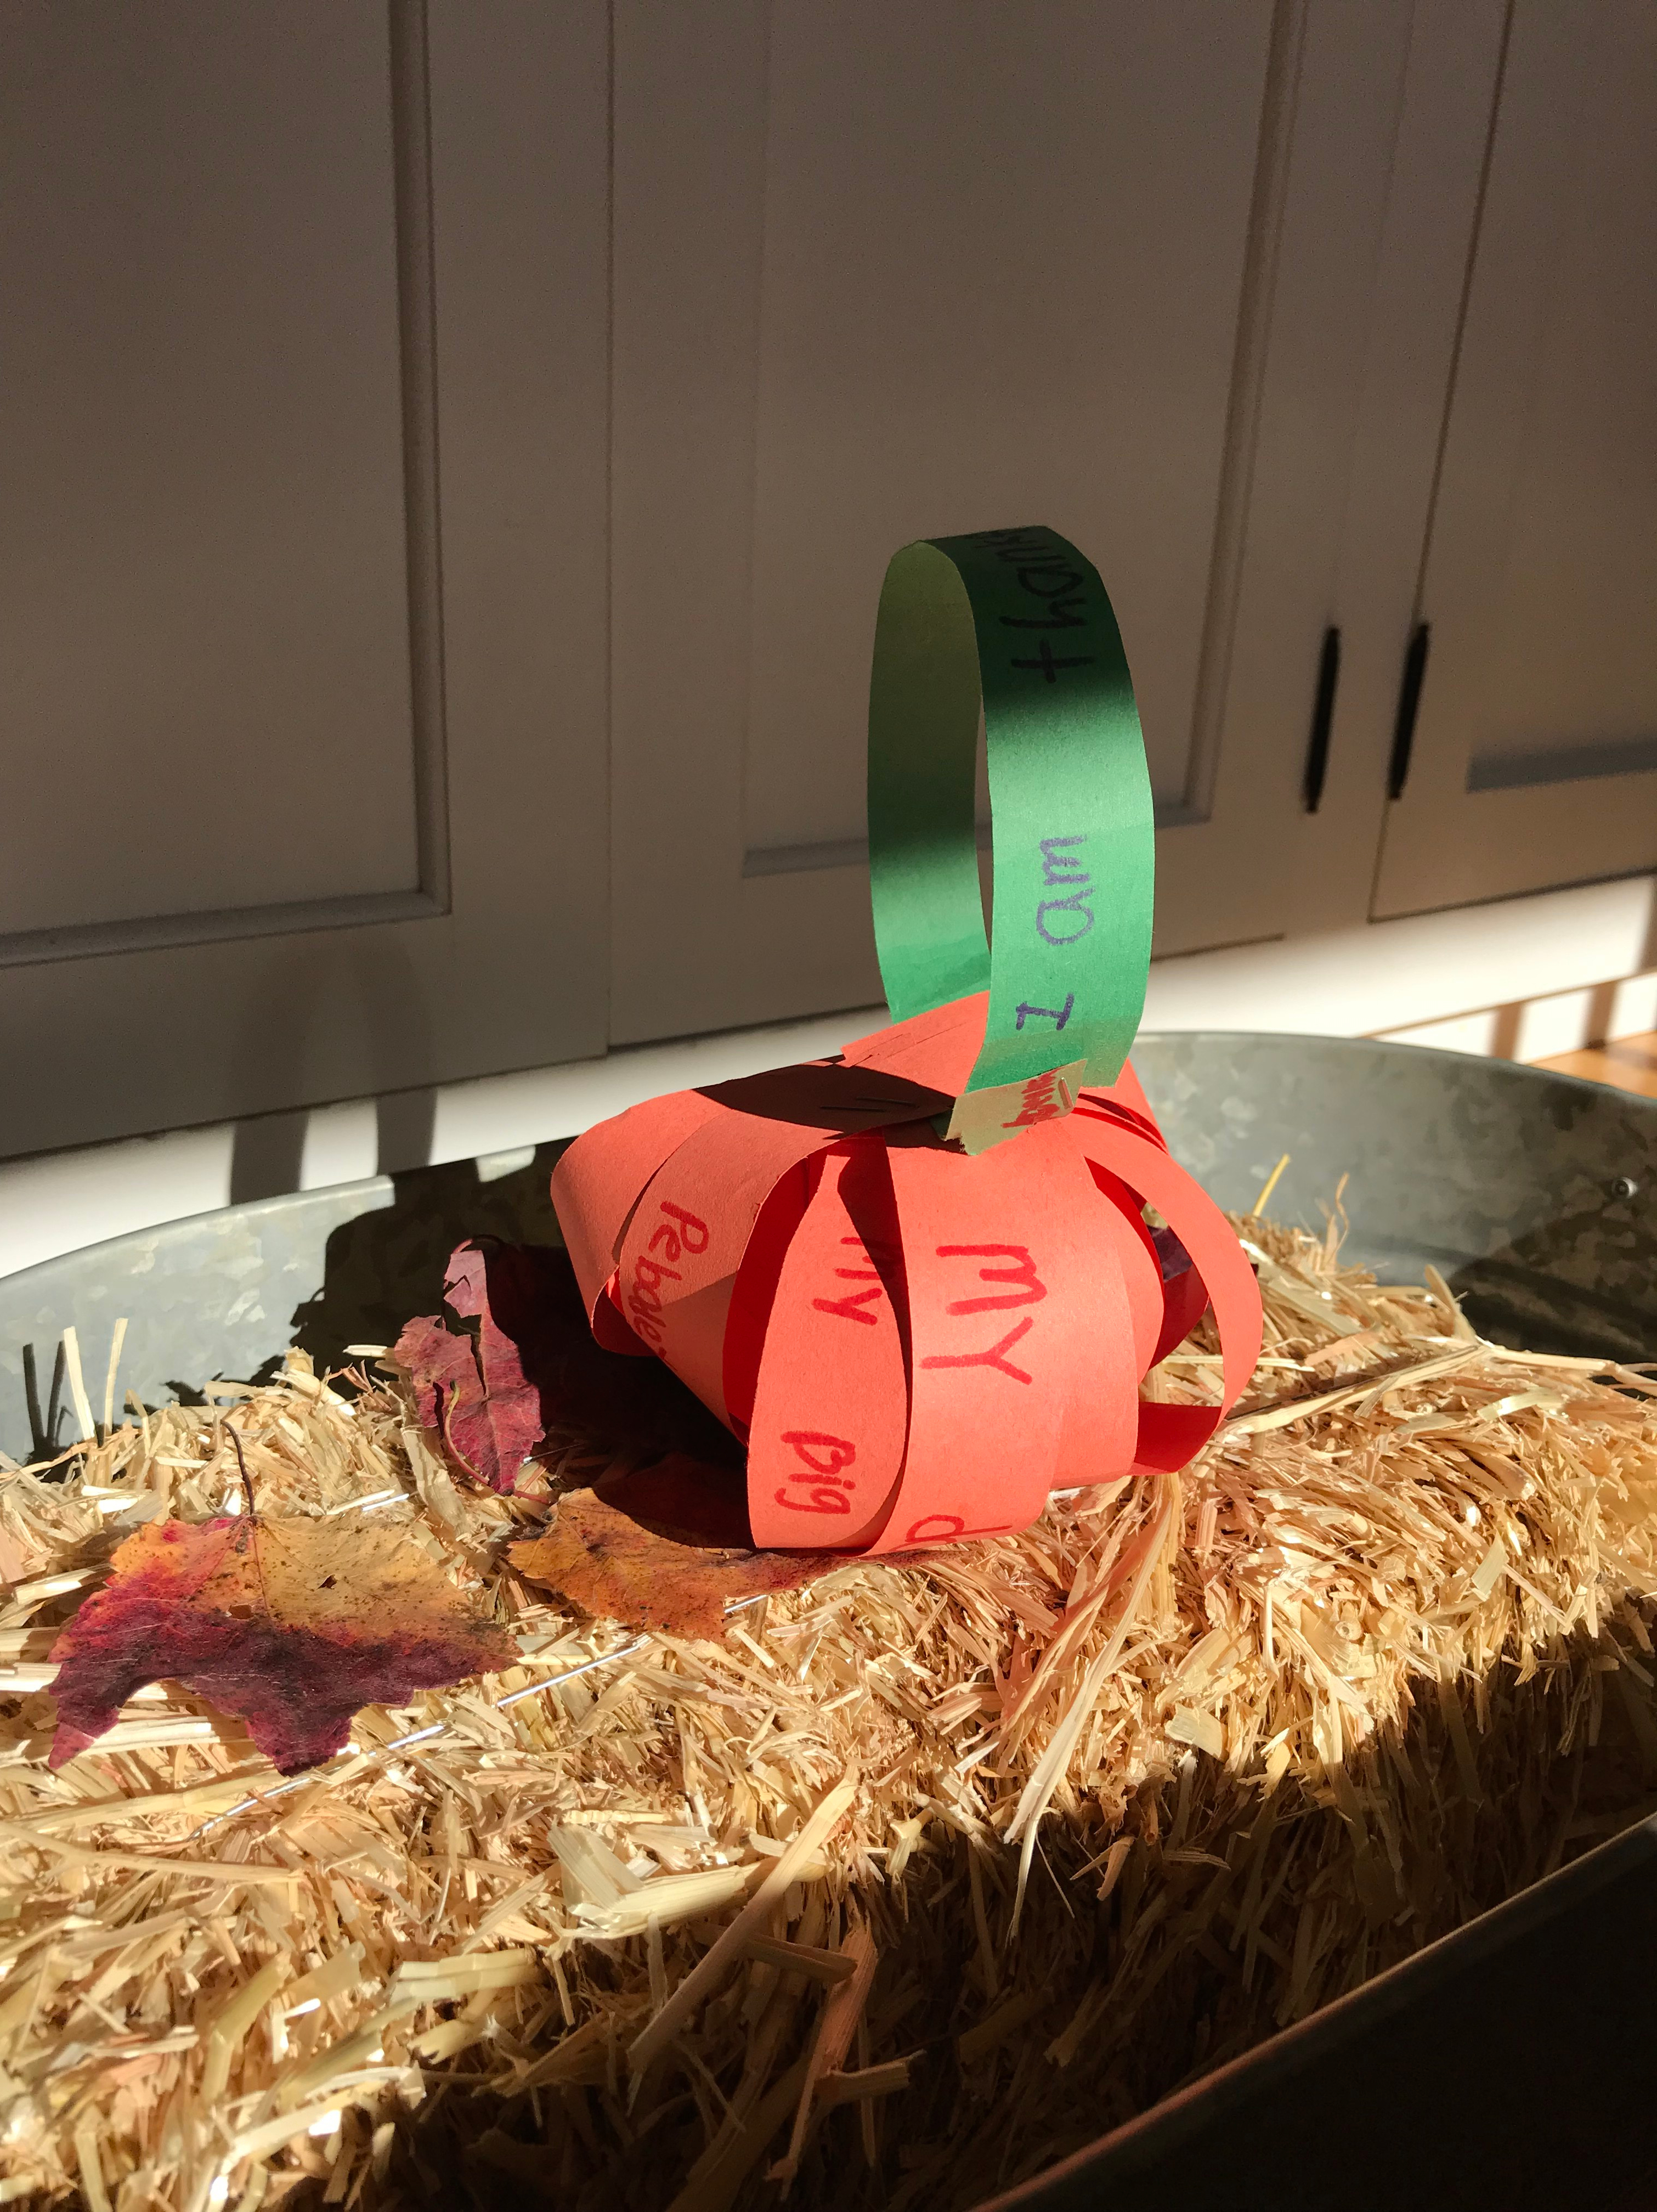
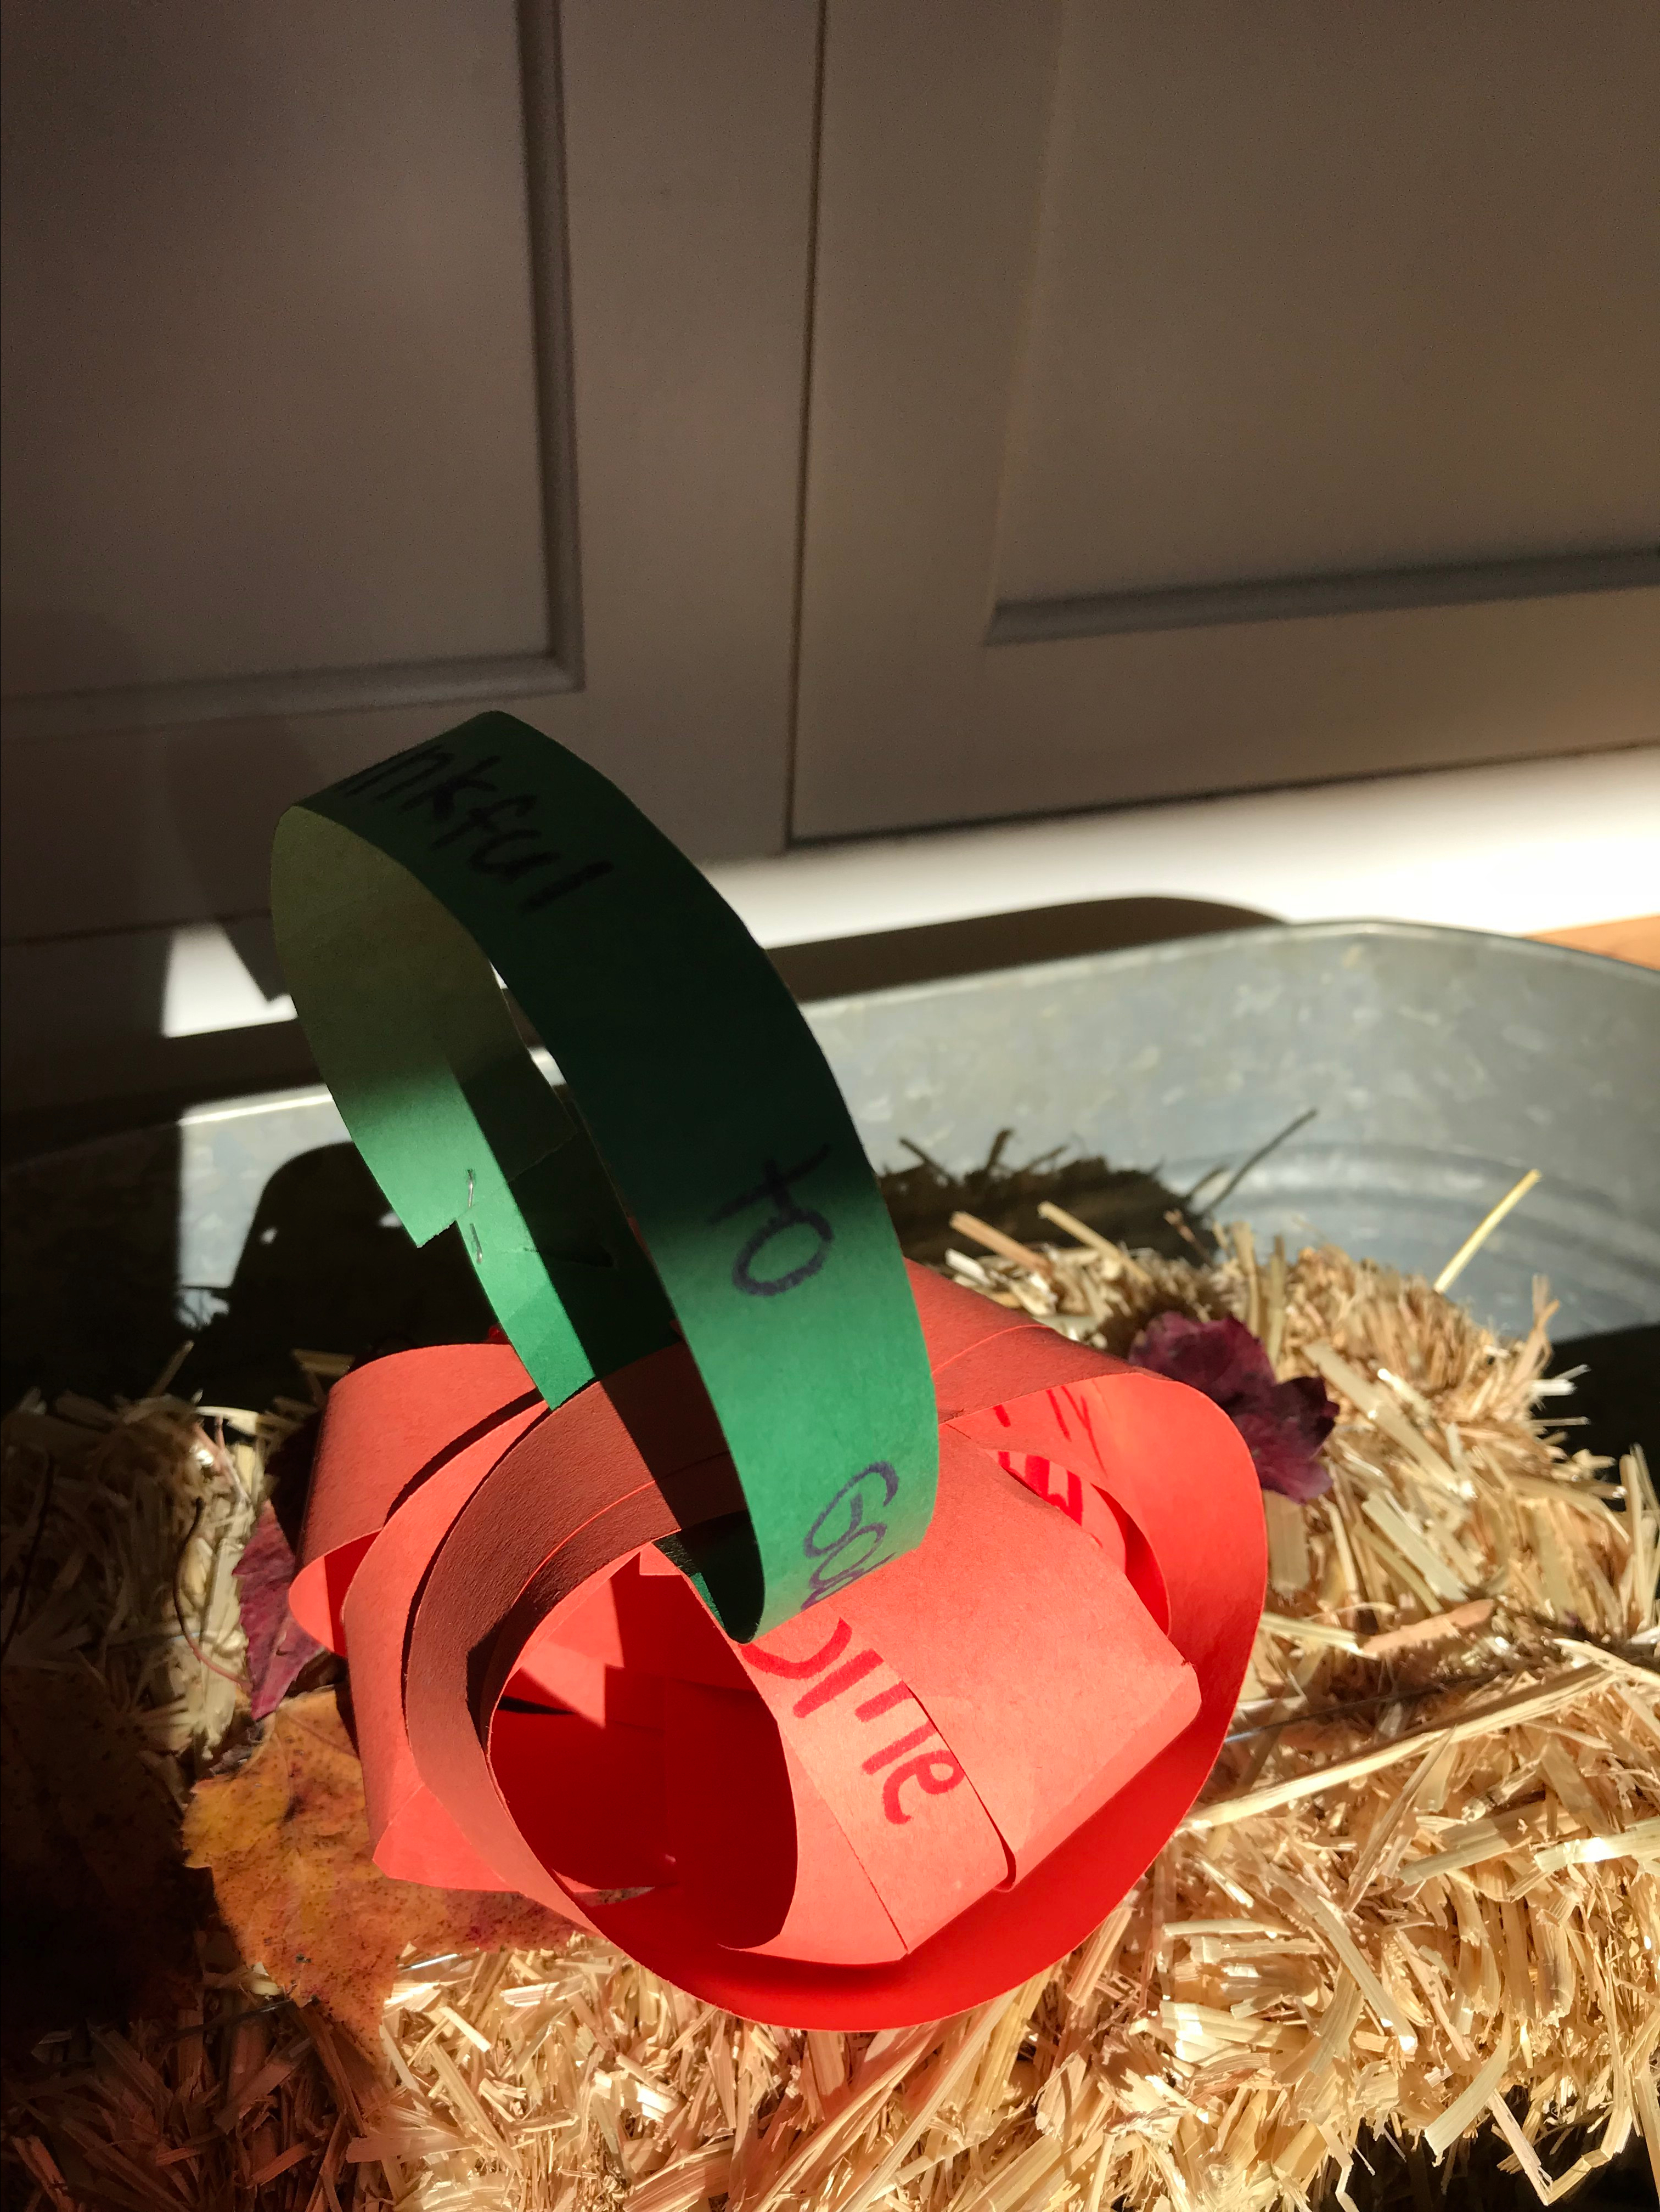
1. Create a Gratitude Pumpkin-ONLY 4 Supplies Needed!

The image above in this post is one of my favorite new crafts we created last week! Check out this simple, decorative way to start speaking with your kiddos about gratitude! 

Create it:

Materials Needed:
*orange and green construction paper
*stapler/staples+-
*scissors

Directions:
Step #1
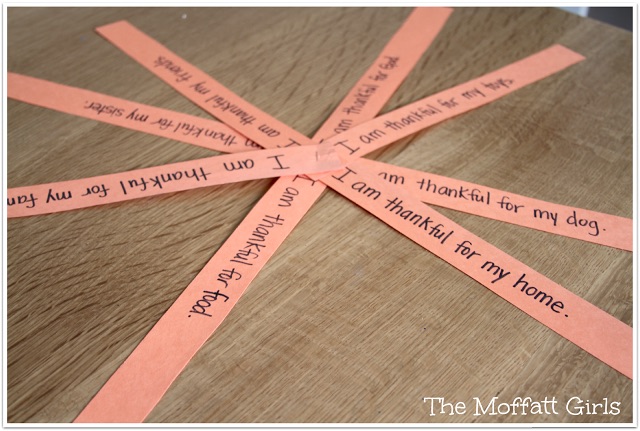
Cut out 8 pieces of orange contraction paper into 1 inch strips.  You will also need to cut out 2 leaves and 2 skinny strips of green contraction paper for the vines.

Step #2
Brainstorm with your kids about tings they are thankful for AND why they are thankful for those people/things.

Have your kiddos write something they are thankful for on each strip of orange construction paper.  

Be sure to leave about a 1 inch space on the sides of the strip so the writing isn’t covered up when stapled together.

http://themoffattgirls.com/wp-content/uploads/2013/10/IMG_2294-1.jpg

Step #3
Use a stapler or tape to attach the orange strips at the top and then at the bottom to form a pumpkin.

Step #4
Add your leaves and green vines. 

You can roll up the green construction in a paper to help curl the vines.

2.Being Thankful–Rocks!

This is an awesome activity inspired by my local library! Get your kiddos thinking about the wonderful things they are truly thankful for, then write them down on keepsake rocks! This activity is one that will last for years to come!

Create it: 

Materials Needed:

    • Flat Rocks–the flatter the better so that writing makes it easy! 
    • Orange or Yellow paint–could be acrylic or even simple water-based paints.
    • Permanent Sharpie Marker–black works best but other darker colors would be great too.
    • Mod Podge indoor or outdoor Mod Podge–depending on where you want these to be displayed.


Step 1: 

  • Set up a “safe” painting space ( we used our hard wood floor and newspaper).
  • Paint the rock on one or both sides

Step 2: 

  • Let the rock dry for as long as possible. You will need it to be completely dry before applying the Mod Podge.
  • While they dry: brainstorm a list of different things/people/places you’re thankful for with your kids.
  • Ask your kiddos why they are so thankful for these things.
  • You can also play the Gratitude Game (below) 

Step 3:

  • Apply Mod Podge with a paint brush in thin layers. The Mod Podge will look white but will dry clear.
  • NOTE! Mod Podge can take several hours to a full day to dry depending. No worries! Just have the kiddos add what they are thankful for at the Thanksgiving Day Table or at anytime you gather together!’

Step 4:

  • Take the Sharpie marker and recap what you spoke about with your kids!
  • Have your kiddos choose people or things that they are most thankful for and begin writing!

My “littles” had so many ideas –we had to create several thankful rocks to fit everything! 


3. The Gratitude Game:

You can also play a great game called the “gratitude” game  based off of the classic “pick up sticks” game while you wait!

Create it: 

  • Print up the free printable above by Teach Beside Me
  • Gather multi-colored sticks like these or we actually used crayons for this! 
  • Simply follow the suggestions on the print up to play or create your own game! Such fun! 


7 great ways to teach gratitude

Source: Parents.com

4. Gratitude (I’m Thankful for) ABC Book 

This is absolutely adorable and, honestly, you can make this with your preschooler or your grade school kiddos!

Think of different things your thankful for and follow the alphabet! You can use this sheet to get you started: 

7 Ways to teach gratitude

Source: Natural Beach Living.com


4. Thankful Post Cards

Thankful postcards

Source: Parents.com

How great is it to get something in your mailbox every now and then? 

This is absolutely ADORABLE and it can be created with simple materials found in your own home! 

Create it:

Use card stock or construction paper with some Thanksgiving picture cut outs and messages from your kiddos and you have a beautiful Thanksgiving creation made right from home! Yay! 


thanksgiving crafts

Source: Our Good Own Journey

5. Create Your Own Thankful Tree


I LOVE this idea! We’re using the inside of our front door for this one but you could easily “dress up” an otherwise blank wall with this great craft.

The best part is, you only need 4 things to make it! 

Create it: 

Materials Needed: 

  • Construction paper or card stock
  • Roll of paper or just tape together smaller sheets of construction paper for trunk! 
  • Markers
  • Tape

  Sticky Note Door Hanger

Source: Parents.com 

6. Door Decor: Daily Thank You Note! 

Adorably simple way to express gratitude every day! Grab some Post it’s and create a door hanger! 


Kindergarten Arts & crafts Activities: Write Secret Messages

Source: Education.com

7. Secret Messages of Thanks

We did these “secret” messages during the week leading up to Valentine’s Day last year and it was a big hit! 

Your kiddos will LOVE getting secret message pumpkins, turkeys or leaves on their doors every morning! 

Easy craft and really gets kiddos thinking about gratitude for others!

Create it: 

Materials needed: 

  • White construction paper–cut into turkeys, leaves, pumpkins or whatever you would like!
  • White wax crayons
  • Newspaper
  • Water soluble paint (tempera paint or watercolor paint) 

Have your kiddos brainstorm different things about others in their family that they are thankful for.

(i.e. I’m thankful for my little brother because he hugs me every morning and it always makes me smile). 

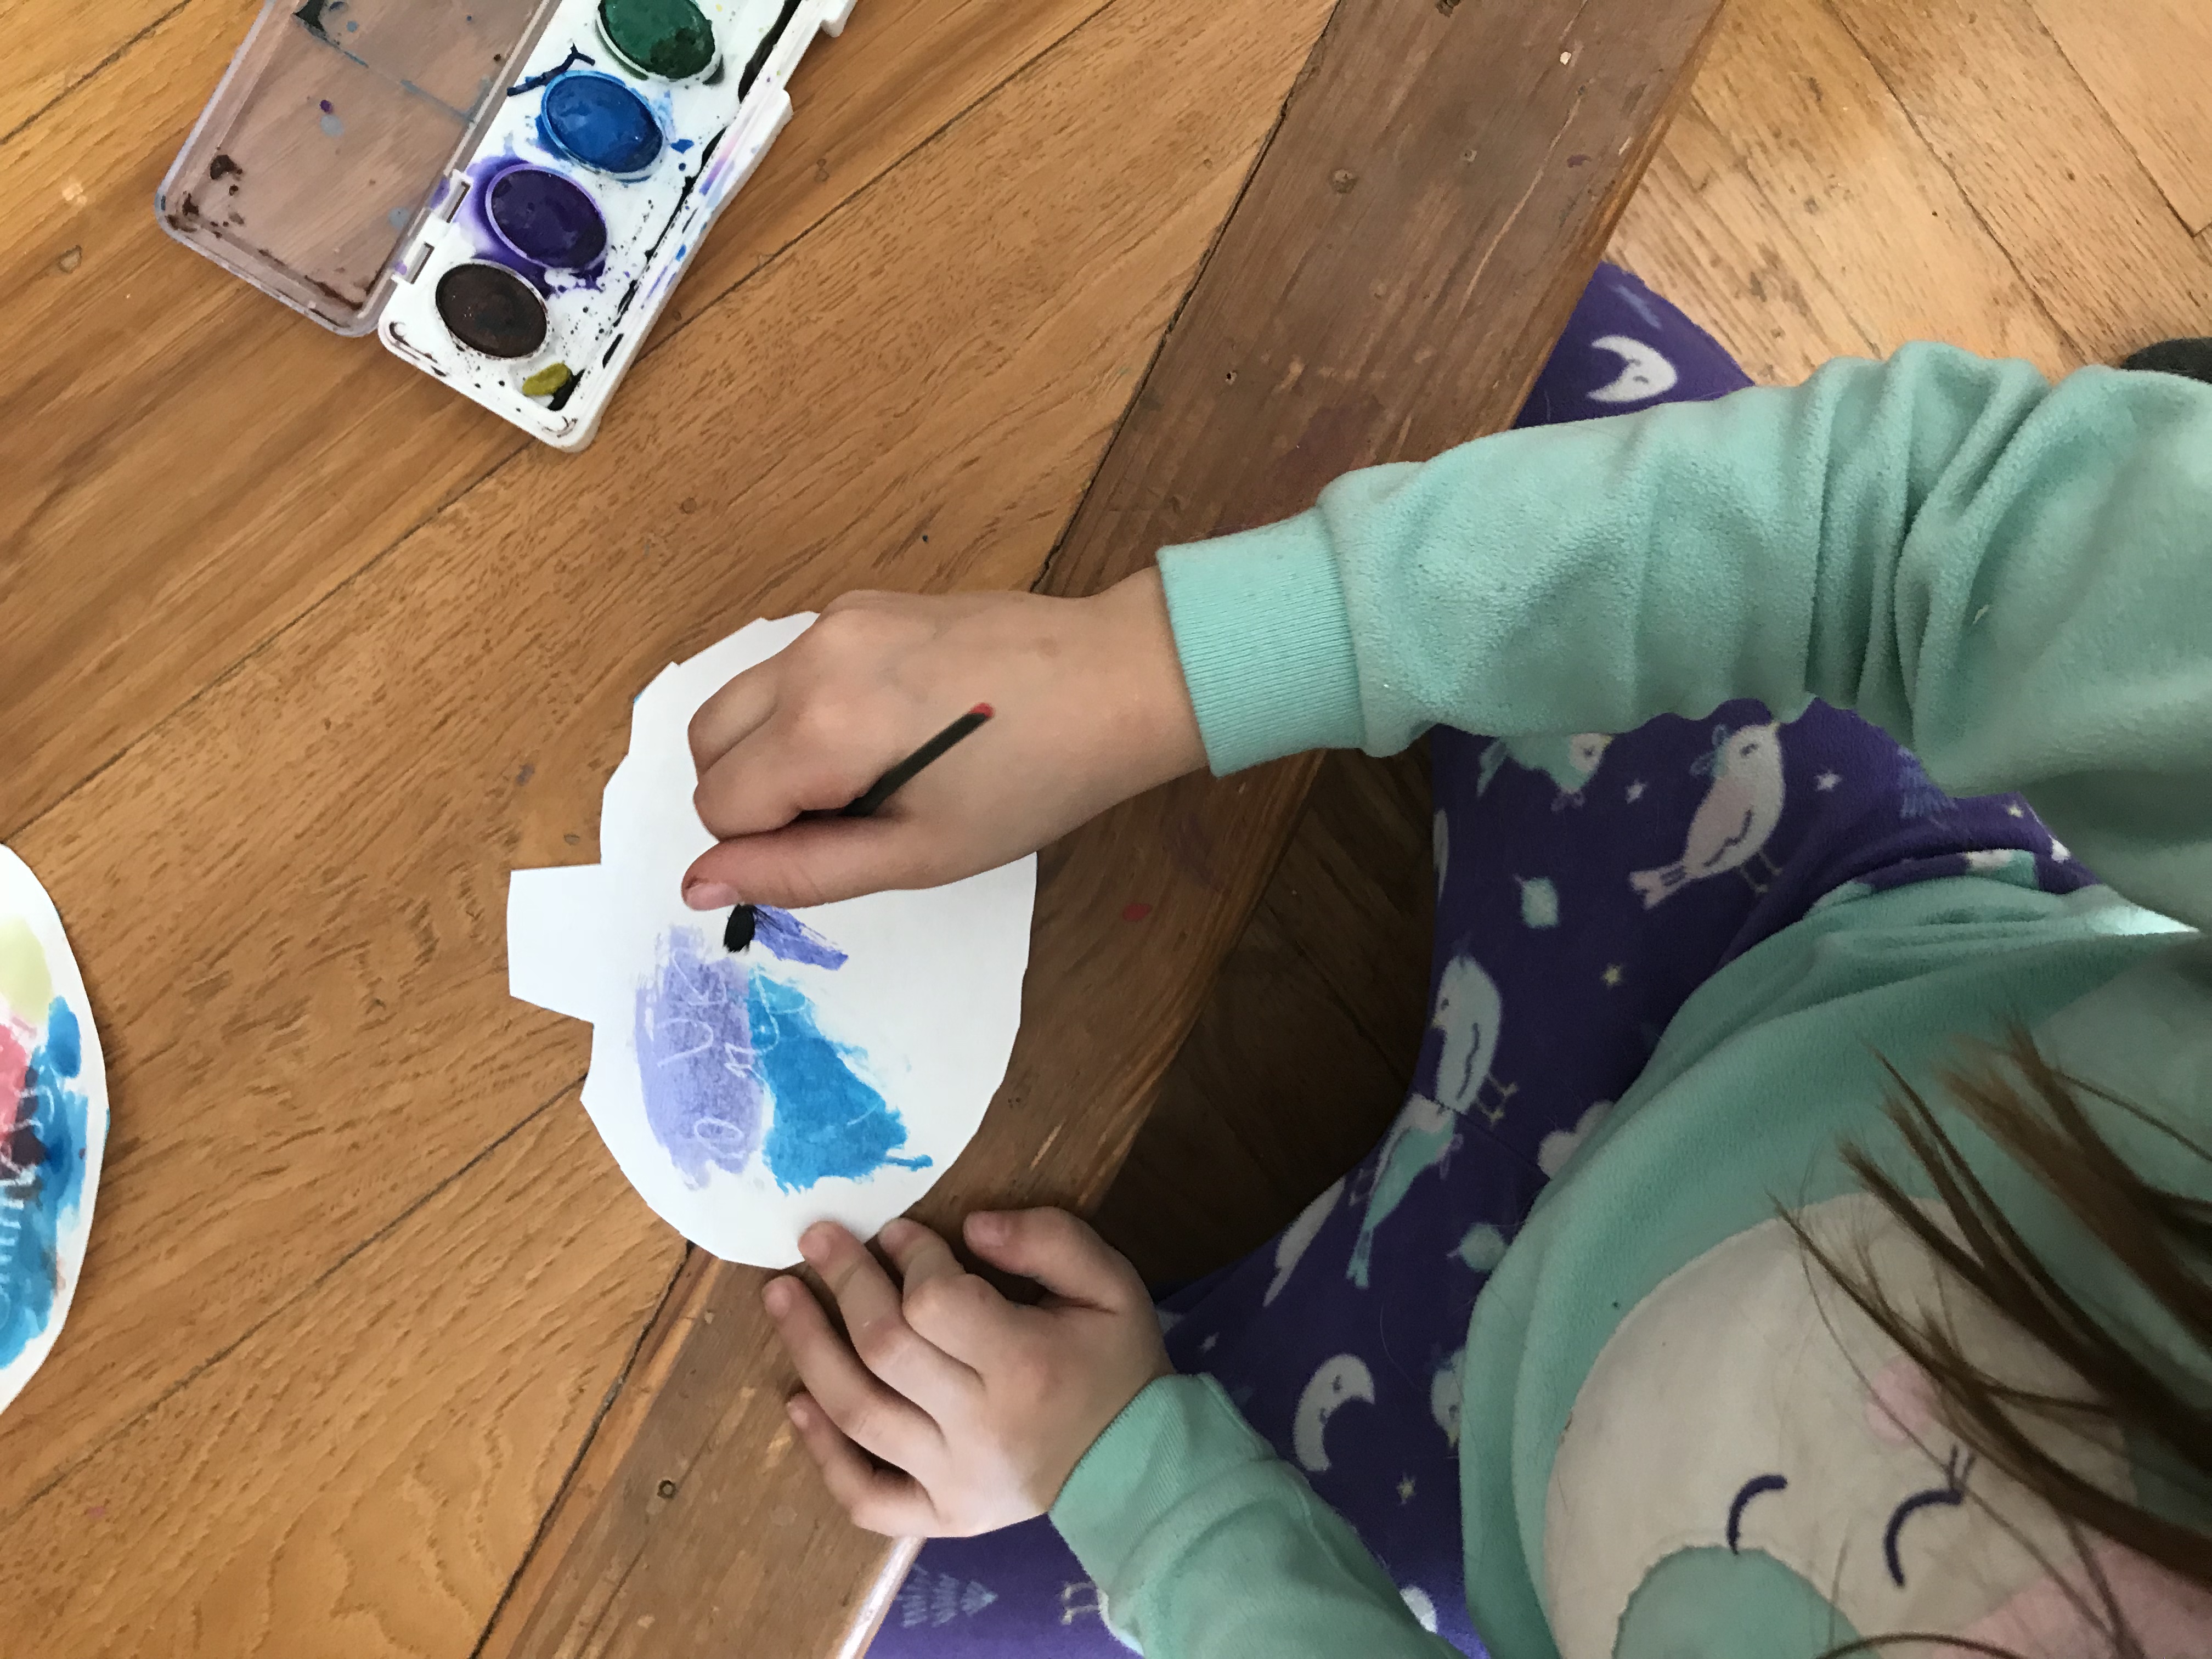
With white crayon, have your kiddos write out on construction paper (or you can write it for them), their secret message. 

They can tape them onto the bedroom doors for others to “decode” later that day or the next day. 

To decode them, simply use the watercolor paint with any of their favorite colors and “wash over” the white crayon! 

The wax in the crayon resists the paint and the message will stand out against what is already colored in! Yay!

Everyday (this could be for a whole month, a week or however long you would like!), have your kids write secret thank you messages to display on bedroom doors or other spots in the house each day.

In the morning, during breakfast or another family time, you can have your kiddos “decode” their thankful messages to each other. 

What a great way to start the day! 

These are all such awesome ways to teach gratitude so create one or choose them all!

Remember: the key is to reinforce gratitude in a hands-on way with your kiddos! 

Do you have a favorite activity that teaches/reinforces gratitude?

Share it here! Leave us a message and we can post it! 

Want to do more than share a post here? 

Would you like to write for The Running Mama? SWEET! We would LOVE to hear from you! 

                   Wait~There’s More! 

Need to earn some extra CHA-CHING this Holiday season?

Find out how on the The Work at Home Woman! 

Holiday Side Hustles-The Work at Home Woman The Running Mama on The Work at hiome woman

An AWESOME site dedicated to helping mamas like YOU EVERYWHERE!


Other Amazing ideas you NEED to check out on The Running Mama(c):


  • Feeling overwhelmed? Crush your every day goals  right here! 


3 Signs that Indicate You Need To Break Up With Your Child’s School

3 signs that indicate you need to break up with your child's school

Ah…SUMMER! For those of us that have school aged kiddos, summer signals  a time of sheer relaxation: relaxed moods, relaxed schedules and relaxed minds. For some parents, it also offers a chance to reflect on the school year that has past and look onward to the approaching year. AND if you’ve had less than a stellar experience with your child’s current school, you may find yourself questioning what to do next.

How do you know you should start the new school year at a new school? There are 3 signs that indicate you need to break up with your child’s school…check them out before they check in for the year. 

**”BY THE WAY~”Our Disclaimer: we are not physicians or professionals. If you think your child is in danger in any way, please contact a professional immediately!

Questioning the “System”

Maybe you’ve been there: your little love comes home from school to declare that he or she doesn’t want to go back…ever. You analyze all of the possible reasons: Is it avoidance? A social problem? The teacher? You try to become a sleuth, (of sorts), in order to figure out what’s going on and you may discover the root of the issue or… you may not. (at least not instantaneously).  All of a sudden, the security you felt in your decision to send your child to that school may be shaken. 

Or, perhaps, the doubt surrounding school systems starts with you.  Maybe questions begin to stir regarding the teacher’s knowledge base or, as you slowly watch communication dwindle and lack luster learning activities pour in, you discover  your definition of “quality education” compared to that of the administration greatly differ.

Perhaps you continually feel a sense that the environment is more concerned with numbers than a child’s genuine love of learning.  Whatever your reason for questioning your child’s educational environment, know that you’re not alone. More and more parents and caregivers are placing more time and, (in some cases), more money into their children’s education. 

“When the atmosphere encourages learning, the learning is inevitable.”
― Elizabeth Foss

“GET TO CLASS” The Dreaded Front Office Scenario

For some,  it may be the one last “little” thing that breaks your nerves about your child’s school, for others, it could be a gradual culmination over time. For us, it got to the point where we simply DREADED dropping our daughter off to school each day.

Between a poor classroom teacher, behaviors in the classroom that were continuing to effect her and, I kid you not, the  “ladies” in the front office, were were done by October.

Let’s, for one moment, discuss the front office. I know, it seems like a weird aspect to bring up but, let me explain to you why this was the final factor in pulling our daughter out of her current school situation.

We bring our daughter into school most days. Each and every day when we walked her in (albeit we were late at times), these “front office faces”, were clearly annoyed by us and/or our daughter.

We weren’t looking for some grandiose welcoming committee. A simple “good morning/how are you —–” would’ve been enough to make us and our daughter feel welcome. 

Instead, we were greeted with glares, or hardly even a look. A stern hand would flash a flamingo pink pass to our daughter joined with a short, irritated, “GET TO CLASS” statement. The rude behavior proceeded especially if she didn’t “get to class” right away.

There is one woman who would, despite the fact that she could see my daughter hugging and kissing her little brother, who would repeatedly speak to my daughter terribly–often raising her voice to tell her to “GET TO CLASS” over and over again–despite the fact that she was simply trying to say goodbye to us. How awful is that? 

It got to the point where I began to allow my daughter to wait in the hall whilst I retrieved her pass from these ladies. I mean, who wants to start their day with that type of a greeting?

It set a tone for the whole day and, in our opinion, spoke VOLUMES about the entire school environment.

Our daughter is six years old, not twenty. She doesn’t “GET TO CLASS”. Why should I, a parent, be the one to point out this terrible behavior from an adult who is, in some cases, the first adult that a child or another parent interacts with once they get into the school. That did it for us. 

So–lesson learned here? Whether it’s considered a “major” issue such as bullying or a teacher that is lack luster OR if it’s a “minor” issue that’s now affecting your child every day, it may be time to close the doors on that school—permanently. 

Don’t feel that your “issue” is too small. Point being: nothing is a “small” issue when it comes to your child’s happiness, comfort and environment to which they spend so much of their time. If your child is unhappy for one OR all of the reasons we’ve discussed, (or others), don’t standby.

Know your rights, speak for your child. 

3 signs that indicate you need to break up with your child's school

Before the Bell Rings: What’s Next

If you’re having second thoughts about your town or city’s school system- stop and consider your options. Does it mean you should immediately change your child to a completely different school? Of course not. Should you start to reconsider what type of schooling is best for your family? Absolutely.

Blindly going into any educational system without questioning it should be a thing of the past. If we think about it, our children spend 6.5 to 7 hours plus per day at school. That’s approximately 35 hours per week away from home–sometimes more.

With your children clocking so many hours in their school environment, it’s extremely important that their school is meeting their needs academically, socially, emotionally and physically–every day

 Everyone has their opinions on education–it might be time to start listening to your own voice, (and your child’s) to decide what’s best for your family. Here’s some helpful tips: 

It's almost back to school! If you're uncertain about your child's current school...you're not alone! Check these signs that show you should start this new school year at a NEW school!3 Signs that Tell You to BREAK UP With Your Child’s School:

3 signs that indicate you should break up with your child's school

1. Your Child Isn’t Being Challenged at His or Her Level:

This was a BIG one for us. Our daughter has always performed above and beyond what one would “expect” for her age. From physical milestones (walking at 8 months) to academic milestones: (she knew her uppercase/lowercase letters at age two and was reading a little before her third birthday), she’s always loved learning and seemed to soak up every little tidbit of information.

She’s also an excellent “rule follower”.

Which meant, that if we didn’t advocate for her, she would simply “sit” in her classroom, (regardless of the lack of differentiation), and “learn” like her peers. NOT what we wanted AT ALL. 

Then there’s the other end. If you’re child is “expressing” themselves during class by acting out…the root cause could be sheer boredom. 

When an administration and/or teacher doesn’t differentiate, the results are devastating for students who are above the “curve”.  

I am, however, concerned about the general culture at public schools—at least at the ones I’ve seen—of disengagement and compulsory learning. So when it comes to my daughter, I opt to invest a little more—to ensure she’s immersed in a community where it’s acceptable, and even admirable, to show natural enthusiasm for knowledge.–Michael  Godsey, The Atlantic

change schools

2. Your Child Isn’t Thriving Either Socially or Emotionally

As children, we’ve all faced uncomfortable situations at school where students or, perhaps even teachers, were simply not behaving in a way that made us feel welcome.

Learning won’t and can’t happen in an uncomfortable environment.

This was the next factor that broke our trust in our daughter’s school.  The environment was not only disengaging but unfriendly and not representative of what we would consider “a place where kindness and learning go hand in hand”.

What’s important here is to make sure we, as parents, really listen to our kids.

Here’s where you should draw the line:

  • Your child is being bullied (and administration has not rectified the situation)
  • Despite conversations with your child’s teacher, there is little or no follow through.  
  • The classroom environment is not conducive to learning (i.e. behavioral management by teacher is questionable, the environment lacks structure 
  • Communication between home and school is sparse or non-existent (your finding more things out about classroom situations from your child rather than the adults in charge)
  • You or your child feels unwelcome. Don’t settle for anything when it comes to your child’s education. Especially when it comes to how you or your child feels when they enter that building EVERY day. 

Bottom Line: ALL children love to learn.  It is the responsibility of the adults who are leading them to help them succeed.

Make no mistake about that. 

Unschooling Quotes by Albert Einstein and Others

Picture and Quote courtesy of https://www.diygenius.com/unschooling-quotes/

3. Your Child Loses Interest in Going to School 

Ok. We’ve all been there. Our  jobs, school, maybe even at sporting events. There are simply “those days” where we don’t want to GO! However, you know your child best, and if all of a sudden your child’s behavior is changing without obvious reasons…it’s time to take a closer look.

Afterall, many times kids theselves can’t pinpoint what’s truly going on–all they know is that they want the situation to END. 

While there are many more signs, we wanted to highlight a few that might easily be passed off as “having a bad day”.Here’s some signs you can look out for:

*Your child refuses to get up for school and/or often complains about an illness you’ve looked into.

*He or she suddenly loses interest in activities he or she once loved.

*Your child becomes quiet or unwilling to discuss school. 

*He or she doesn’t want to attend certain portions of the school day (i.e. recess, lunch or other activities)

*Your child stops eating at school or at home.

***Please NOTE: Some of these signs can be an indication of a serious problem or that your child is in danger. The above are possible indication–as always– please contact a physician or professional for help.
Warning Signs that Indicate you should change your chiid's school

Get Out When It’s NOT Right:

Ultimately, you know your child. Before they step on that school bus this coming fall, evaluate the past school year. Was something just “off”? What about the teacher, the administration, the overall environment?  Go with how you feel and put a check mark next to these warning signs to double check the facts:

1.Your child is withdrawing/behaving uncharacteristically (not wanting to get out of bed was a sign from our daughter).

2.Lack of communication from school (you’re finding out more from your child than you are from the adults in charge–ANOTHER big one for us)

3.Teacher engagement is lack luster (again, another warning sign).

4.Administration (principals and even Superintendents “speak well” but perform terribly on making significant, positive changes. 

ALL children love to learn.  It is the responsibility of the adults who are leading them to help them succeed. Make no mistake about that.

DON’T Be AFRAID to BE DIFFERENT 

While many people are herded through one type of “system” or another, there’s something even more important to be recognized here: 

That there are vast choices when it comes to education. There are many different thoughts on schooling to be explored if the public education system or any system is NOT working for you or your child. 

Homeschooling, private or Montessori schools offer other ways of thinking and educating.

We are the best advocates for our kiddos. Learning, at ANY age, should be fun, engaging and enjoyable. We can all ensure that our kiddos have the best experience possible simply by tuning into their needs.

We’re All in the Same Boat

Do we know where our children will be for the 2018 school year yet? Absolutely not!  What we  ABSOLUTELY DO know is that we aren’t allowing our daughter or son to be exposed to an environment that represents the opposite of what we feel promotes an  authentic love of learning. 

Neither should you. There are choices. 

As for that terrible teacher our daughter had from last school year–she’s no longer with that school system. Hmmmmmm…….

Questioning your child’s school or the educational system? Have feedback for others who are? We would LOVE to hear from you!

Post a Comment Below! 

Research shows that if you love this post you’ll also love….

*Simple Summer Fun Activities

*3 Awesome Water Play Activities 

Looking for a chance to post your AWESOME content on The Running Mama? Check out how to become a GUEST BLOGGER! 

Looking for AWESOME Back to School Supplies, Gear and/or Products?

Below are some awesome products we’ve tried and WE LOVE! These are sure to jump start you into the new school year!

(*By the way–the links below are affiliate links which means The Running Mama will receive a commission from them). 

Change schools

Simple Summer Fun Activities!


Simply Fun Summer Activities!

Whether the kiddos are in camp and you’re in search of next week’s plan, or you’re on the downswing from your Fourth of July vacation,  we’ve uncovered three amazingly simple summer fun activities to keep the kiddos busy on one or several of your upcoming summer days! 

FYI! We use Affiliate Links Below! Read More about this Here

Small disclaimer: Please use discretion when completing these activities with children 4 and under. Adult supervision is required for all of these activities, regardless of ages involved! 

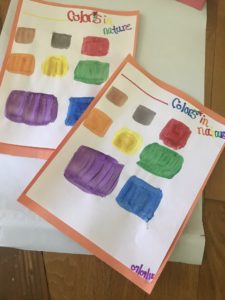
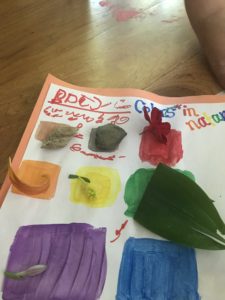
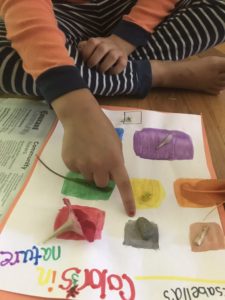
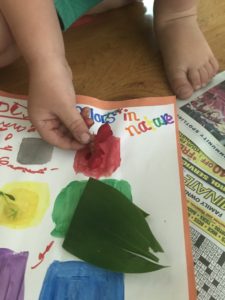
Colorful Nature Scavenger Hunt! All the Colors of Nature~A Scavenger Hunt

This was sooo much fun and took about 5 minutes to create! Win-Win! 

*Heads up! There are affiliate links below! You can read more about that here.

Materials:

  • Construction paper (used as a frame for white paper—optional)
  • White paper 
  • Markers, colored pencils or paint (I used paint)
  • Small baggie for collecting scavenger hunt items
  • A backyard or outdoor space
  • Small prize (optional of course) I gave my kiddos a cool treat (Italian Ice) as their prize!

That’s it! I created the templates ahead of time for this scavenger hunt but you can certainly have your kiddos create these as well! 

Directions: You can read a book about colors (the one below is a FAVORITE of ours) or dive in! Here are some pointers when starting this scavenger hunt:

  • What is this scavenger hunt  all about?
  • After some guesses, you can further their thinking by asking them to look out the window and describe what they see (they will probably say grass, sky, flowers, trees, etc).
  • Ask your them to look closely at the colors of nature and describe what they see. 
  • Explain that nature is full of color and we often forget it’s even there! Today, they will take a closer look at the amazing colors of nature!

Let them know they can fill their bag with as many examples of colors to fill in their charts as possible! 

If you’re kiddos get “stuck” during the hunt, you can certainly give them hints (I had to help out with purple and blue)! 

Post Hunt: 

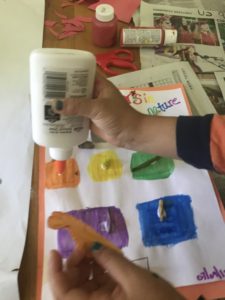
We headed back inside, broke out the Elmer’s School Glue and attached our nature treasures! Such fun! 

Nature Scavenger Hunt!


Paint with glueWith food coloring

Simple Summer Fun Activity # 2~ Salt Art! 

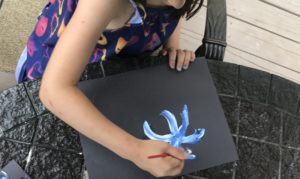
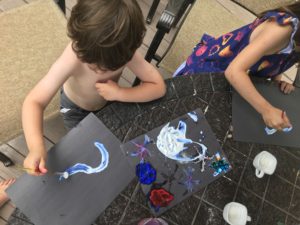
These simple summer fun activities are such a blast-this one is no exception! We originally found this one on Pinterest (of course).Here are the basic materials (NO worries if you don’t have some of these…we’ll get to that).

Materials:

  • Salt or sugar (salt works best)
  • Watercolor paints OR food coloring!  If not–water down other kid-friendly paint!
  • Elmer’s Glue (or any glue that has a small tip tube–if not–see our little shortcut below!)
  • Thicker paper like construction paper or card stock…BUT if not, you can use thinner paper (i.e. paper you use for your printer).With thinner paper…the design won’t last because the paper is too thin…but still fun to create!

Here’s a shopping guide for these materials: 


                      Now, let me preface this with the fact that we’ve tried this two or three different ways and we’ve found out a few different things along the way…

Shortcuts IF You Don’t Have Some of the Materials:

  • IF you don’t have salt, you can try sugar….but it may not work AS well considering the granules are a bit bigger (note firework picture below)
  • IF you don’t have white Elmer’s glue, you can try tacky glue…(which we used with popsicle sticks) but it may not make those fine glue lines like the Elmer’s (again see the fireworks we made below)
  • IF you don’t have thicker construction paper  the salt art may not hold up as well…as we tried on thinner paper in the pictures shown and, although it’s pretty cool, it won’t last in terms of keeping the shape of the art for long

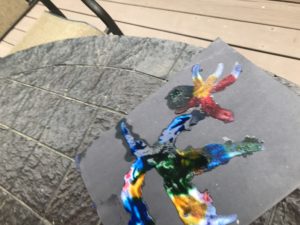
    Salt Art!We didn’t have Elmer’s glue…but that didn’t stop us! 
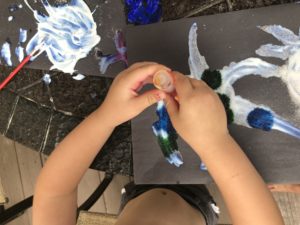
     

Sugar experimentOur first experiment with sugar and food coloring…came out great!


STILL super fun and a great “experiment” on how water absorption works!  Here are some easy pointers you’ll want for this:


  • Find a space…we did this activity on the floor with newspaper–but outside on the driveway is awesome too!
  • Use a marker or “free draw” with the glue whatever design you’d like! Fireworks, flowers, animals…let your kiddos get creative.
  • Pour salt over glue
  • Pick watercolor…be certain there’s enough water and color on the brush
  • LIGHTLY touch the tip of the paintbrush to the salt and….boom! The color attaches itself to the salt and spreads….soooo cool! 

Check out how we did it below:

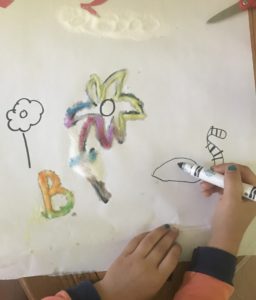
Step One...draw! We used marker…which ran but was easier for our kiddos!

Our daughter loves to draw her ideas out first!
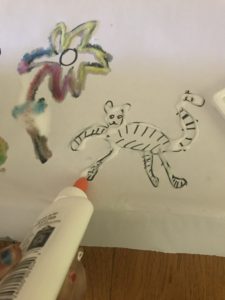
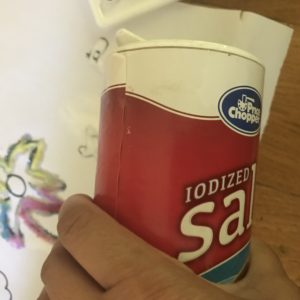
 

Step Two: Outline with Glue! 

Step Two: Add Salt! 

salt


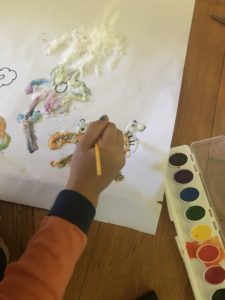
Step Three: Add Water Color or Food Coloring! 


left arrowAdd Water Color Paints or Food                                                                                                                                                      Coloring and–WOW!


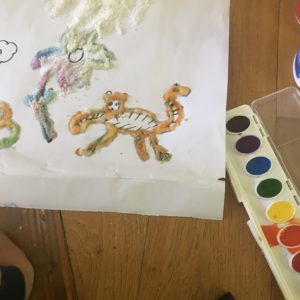
                                                                                 Finished! 

Here’s the finished piece above. Super adorable…now if I could only find a way to preserve it! After an hour or more, the marker faded/ran and the water bled into the paper. If you have any ideas…please comment below! 


Simple Summer Fun Activities Everyone takes part!

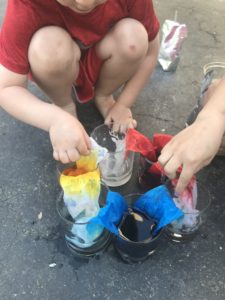
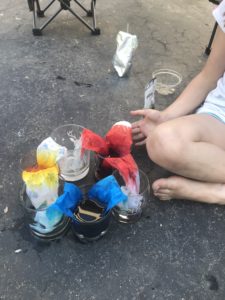
The Walking Rainbow

Ok–this simple summer fun activity  is by far the COOLEST!  We were amazed at  how quickly the water and color traveled through the paper towels!

This goes along perfectly when discussing the idea of absorption (if you wanted to make a lesson out of it you TOTALLY can), this “walking rainbow” is perfect for a warm day!  I completed it with a six year old AND a three year old…so no worries on age ranges here…it’s perfect for everyone. It not only demonstrates how water absorbs, but it also shows how, when color is added to water, the color molecules move with the water! SOOOO cool! Check it out: 

Summer Walking Rainbow learning

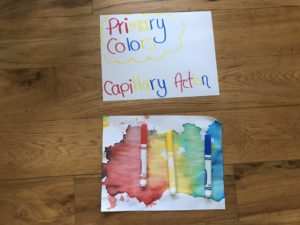
Used a piece of paper after to dry the paper towels on and created artwork with it!

Here’s the Educational Piece: 

For your little ones learning about colors: 

Primary Colors: There are 3 primary colors–red, yellow and blue! These are called primary because they are used to create other colors! 

For older kiddos ( as well as little ones! You can still review what primary colors with older ones as well!)

Capillary Action: When liquid (like water) moves through a source (like a paper towel) against gravity. 


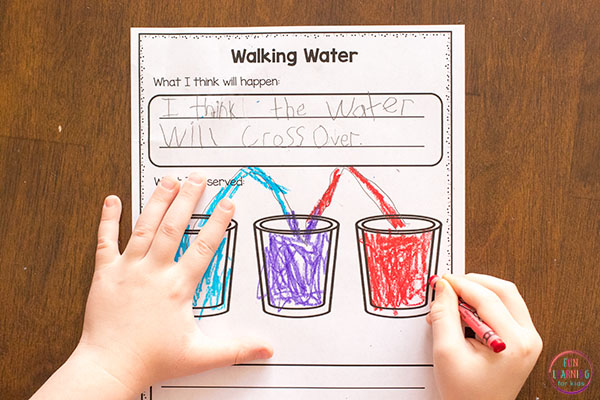
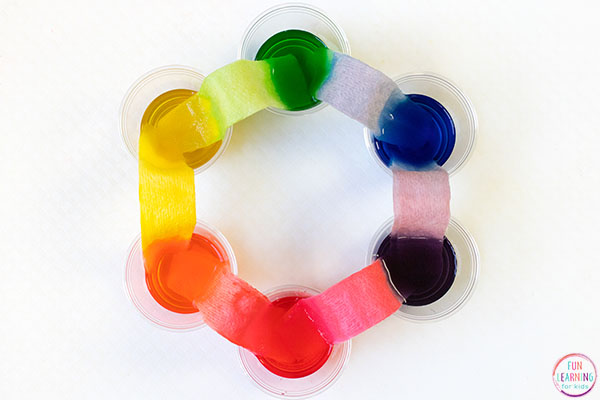
There is also this ADORABLE worksheet from Fun Learning for Kids: Walking water science recording sheets.

Here’s the link to grab the FREE worksheet: https://funlearningforkids.com/rainbow-walking-water-science-experiment-kids/ 


EasyPeasy Materials You Will Need For This: 

  • SEVEN Clear, wide mouth cups
  • Food coloring (primary colors)
  • Water
  • 7 or more Paper towel sheets–we cut long enough pieces to fit from one cup into another.

Question to Ask Your Kiddos: 

  • What do you think will happen to the paper towel once it’s in water?
  • What do you think will happen to the water?
  • What is happening now?
  • Why do you think the colors are changing?
  • Why might the water be able to move up against gravity like that?

How this Science Experiment Works:

The water moves up the paper towels through a process called capillary action. The paper towel is made from fibers and the water is able to travel through the gaps in the fibers.

The gaps in the paper towel act like capillary tubes and pull the water upward.This is what helps water climb from a plant’s roots to the leaves at the top of the plant or tree.


The water is able to move upward against gravity because of the attractive forces between the water and the fibers in the paper towel.

STEPS:

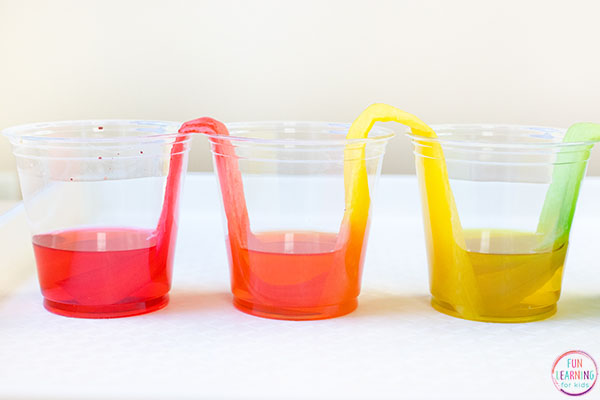
1. Place 7 cups in a circle or in a row  and pour water in the 1st, 3rd, 5th, and 7th cup. I poured them almost all the way full. I have since heard that fuller is better.

2.  Add 5 drops of red food coloring to the 1st cup and the 7th cup.

3.Add 5 drops of yellow food coloring to the 3rd cup.

4.  Add 5 drops of blue food coloring to the 5th cup.

5.  Take a half sheet of paper towel and fold so they look like the picture below. 

6.  Trim off some of the length so it’s not sticking out of the cup too high—the water and color will “walk” quicker this way! 

Walking Rainbow-The Running Mama

Watching the magic happen


8. Place one half of a rolled paper towel in the 1st cup and place the other half in the cup next to it. Then another paper towel from 2nd cup and into the 3rd cup.

Color is traveling with the paper towel

Watching the color travel within the paper towel!

9. Continue until you have placed the last paper towel that drapes over from the 6th cup to the 7th cup.

Now the fun begins! Watch the cups! You should see the colored water begin to crawl up the paper towel. 

**Because I completed this with little ones, we set a timer and checked in on the experiment every three to five minutes to see the changes! 

Do you have a favorite activity you would love to share with us? Share it in our comments! We would LOVE to hear from you! 


Wait-there’s More!

If you’re looking to expand on the water absorption theme or just looking for simple summer activities…check out some of our top activities here: 


We LOVE, LOVE, LOVE to hear from you! Leave us a comment below! 

Write With Us!

Blog for Success!


           Write for The Running Mama!


Thank you for inquiring about writing with  The Running Mama! 

The Running Mama is a blog about the ups, downs, and in-betweens of being a mama! It’s all about finding balance between who you are all while raising little ones and helping them discover who they are.

Our topics cover being a new mama, a working mama, a stay-at-home-mama, a healthy mama, a mama who loves to run (and how to fit that in!), a stressed mama,—and everything in between!

We also love to give our readers information about:

  • Awesome crafts to create with kiddos
  • Teaching kiddos in new and out-of-the-box ways
  • Health tips
  • Running
  • How To’s (from how to make money while home to how-to throw an awesome birthday party!)

You can check out some examples of our posts by clicking here 


                  We’re OPEN to other ideas and pitches! Send us your thoughts!~                                                            therunningmama5@gmail.com 

                                   **Please note that not all the blog posts pitched to us will be accepted/published.**


Looking for Guest Writers!

What Happens When I Write with The Running Mama?

  • Opportunities to gain exposure and get your blog promoted on a different website
  • Promotion  on social media (Pinterest, Twitter and on Facebook boards)
  • Potential traffic from The Running Mama
  • Experience writing high-quality blog posts

How Do I Write a Blog Post for The Running Mama?

We like to make it simple for you to post to our page! We also need to make sure that each post is representative of who we are and super helpful to others. Here’s some details about posting to The Running Mama:

  • 900 words or more😊
  • We love posts about being a mama, teaching, learning, crafting & more!
  • You can add in your blog name/URL where necessary.
  • NO Affiliate Links-Sorry, we don’t want pure advertisements
  • You may include a link to items you sell in your post (please email us for specifics on this!).

Some Other Quick Tid-Bits:

  • You own your content. We will not “claim a stake” on your original material.
  • Original, unpublished content, please! If you publish the same blog post elsewhere, we can not publish it. This prevents duplicate content and the likelihood of getting penalized from search engines.
  • The Running Mama reserves the right to edit your post for content, SEO, adding affiliate links or for other purposes.


Reach out to us at  www.therunningmama5@gmail.com!  Please allow us between 3 to 5 business days to respond to inquiries!


We can’t wait to hear from you! Pitch and post with us…run, mama, run!


5 quick ways to simplify

3 AWESOME Water Play Learning Activities!

Water Beads are SO Fun!

So I’m not sure if it’s the “teacher blood” coursing through me or if it’s purely my own love for teaching and learning but, without fail, each time we find something for our kiddos to experiment with I’m always trying to find a way to turn it into a learning experience. In this case, I stumbled upon these “Dew Drops” (aka Water Beads) recently and they are FAN-TAS-TIC! Not only are there PLENTY of beads for the price…they also come complete with marine life creatures–PERFECT for teaching while playing! Yay! Whether you’re seeking a teaching opportunity or are just looking for some “cool down time” this summer…these activities are right up your alley! 

P.S.: There are Affiliate links associated within the ideas below! I receive a commission from such links…you can read more about that here in our Disclosure page.

Check out this printable for an easy step by step mini lesson: Water Absorption and Marine Life Lesson Plan with Worksheet!

As a quick hint for “teaching” these activities with your little ones: 

  1. Start by discussing water absorption with the sponge water absorption activity below! 
  2. Choose one of the books below on water absorption and/or the ocean to read aloud!
  3. Lead into water play with the water beads and marine life! The kiddos can explore/discuss water absorption as the beads take on water AND they can explore the marine creatures  to the books you read about them! 

Here are those awesome activities I was describing: 

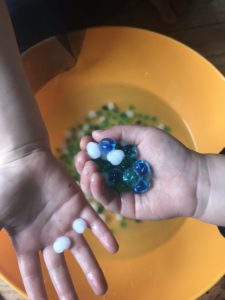
COOL Ocean Water Beads with Marine Creatures


Dew Drop or Water Beads

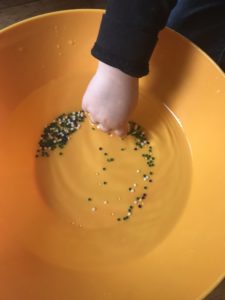
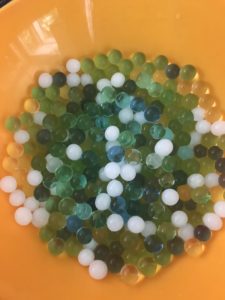
After approximately 3 hours of absorption…

Water Beads

The beads are actually hard when you get them…and sooo tiny!

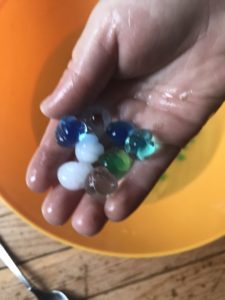
This is an AWESOME find! While the water beads take some time to absorb water (very similar to those “grow animals” you can “hatch” in water…the package says it will reach full absorption around 8 hours), we were still able to see changes in the beads fairly quickly. We also played with them plenty as they grew!  The water beads are cool to the touch and are an amazing sensory activity!  

Not only do these beads  last a LONG time and provide countless hours of sensory fun for all ages, BUT they include marine animals as well! If you’re planning a trip to the aquarium this summer, you can easily                                                                  complete this activity as a precursor to that trip!


Next Day! So Fun!


Science Connection:

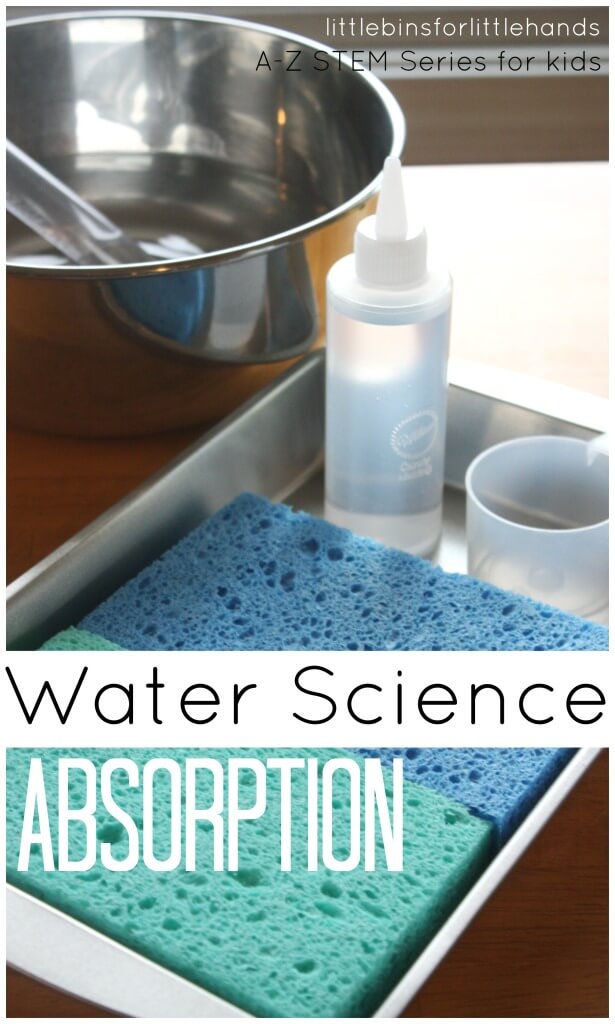
Pair this activity with a brief discussion about absorption! Use sponges to demonstrate how certain materials “soak up” water and expand when water is taken in!

Here’s a visual/tutorial  on how that might look from littlebinsforlittlehands

Absorption Science for Kids STEM activity Water Science Experiement


Here’s the “teacher-speak” background info about absorption:

Sponges are made of loose fibers with lots of space between them. The holes between the sponge fibers absorb the water, and so the sponge material swells up with water. This stops the water coming out of the sponge when you lift it out of the water. When you squeeze the sponge you are forcing the water out of the holes in the sponge.

A wet sponge will absorb more than a dry sponge as water molecules are highly attracted to one another!


Book Pairing Opportunity: 

Pair this activity with these books on marine life and absorption to create your own mini lesson! 

Here are some AWESOME titles our families love: 

These pages actually MOVE as you turn them! The images “come to life” and include a description of each animal featured. 

If you have a mini oceanographer, this book is for YOU! Filled with stunning photography and facts on every aspect of ocean life, this is a book that WON’T get put down! 

We own a few of these AWESOME “First” books from National Geographic and we love them! This book about the ocean features 100 adorable animal photos  facts about the creatures’ sizes, diets, homes, and more. 

The REAL creature’s from Disney’s Finding Nemo/Finding Dory are featured in this book! All captured with beautiful underwater photography and cool info about our oceans! This book includes fascinating facts, maps, and marine conservation tips and efforts. 

Adorable book that explains the usefulness of water! Step 1 Scholastic Reader. 

Wrapping Up: 

Whether you’ve decided have fun with water one day or you have a set plan in mind, remember that genuine teaching happens almost spontaneously! Let your kiddos be the “drivers” for any learning activity and it’s bound to go  far! 

Below are some are the resources we mentioned earlier! Have fun and if you have any questions or suggestions…we would LOVE to hear from you! 

Teaching Suggestions for this Activity! 

  1. Start by discussing water absorption with the sponge absorption activity below! 
  2. Continue your discussion about absorption with water beads and the miniature marine life creatures! The kiddos can explore/discuss water absorption as the beads take on water! The miniature marine life creatures will spark conversation naturally! 
    • Kids can select one of the marine animals from the figurines then pair it with one of the books featured above!   
  3. Choose a book from above to pair with a selected marine animal or have your kids select by just their own interest!
  4. Wrap up with an awesome trip to your local aquarium or a day at the beach! 

Don’t forget this awesome FREE printable on these activities: Water Absorption and Marine Life Lesson Plan with Worksheet!


5 Fantastic Father’s Day Ideas!

Father's Day!

Fantastic Father’s Day Ideas!


We’re OFFICIALLY 6 days away from Father’s Day! While this day takes on different meanings for everyone, the act of celebrating/commemorating that remarkable guy in your life is what Sunday is all about! Whoever you celebrate on this glorious day, we’ve captured five of the best ideas, (with a “smaller is better” theme in mind), to help you show some major love this Father’s Day (minus the tie…unless he likes that sort of thing!). 

Plan Some Downtime-Pressure Free

Does the dad in your life work a ton? ALWAYS on the go? Planning an outing complete with an amazing dinner may seem like a good plan to you, but remember, this is really about him. Father’s Day is really about letting him decide what he would like to do…minus the pressure. Hanging out at home may be just the ticket to a truly awesome Dad’s Day.

Here are a few “down” time ideas that are pretty simple but may help make it the best Dad’s Day-Ever:

  • Let him sleep in! 
  • Surprise him with breakfast and coffee first thing
  • Backyard games from baseball to horseshoes…he picks it!
  • Biking or taking a leisurely walk in the neighborhood

Awesome Activities that Aim to Please! 

For some, a perfect balance of downtime mixed with an outing is the best dad’s day combo anyone could ask for. Here are some ideas that can include the kiddos if you have them in tow:

  • Visit a local brewery! With craft beer gaining some major popularity lately, breweries seem to be popping up all over the place! Aside from serving up some pretty amazing beer and atmosphere, most have incorporated full on restaurants or even food trucks!  Dad can drink, kids can eat…win, win! 
  • Go for a Hike!  There are so many spots you can explore in your very own backyard! 
  • Go Deep Sea Fishing! Has the dad in your life ever wanted to try his hand at fishing out on a boat in the ocean? there are several charters that go out for half or full day adventures. This may be just the thing your special guy would want to try! 
  • Get Sporty! Do you have an avid baseball or soccer fan? Grab a pair of tickets to a professional or semi pro game to celebrate the day! Another idea-even if your dad’s favorite team is out of town on Father’s Day, you can always schedule a tour of the stadium or visit a local sports museum! 

 It’s often the smallest things that make the biggest impact–spending time together and reminding dad or your special guy just how much you love him is most important of all!

Getting Crafty: 

If you have younger kiddos at home, you can plan a low-key crafty activities with dad that’s sure to please both him and your kiddos.

  • Take home pottery to paint: Instead of handing dad a new coffee mug, why not have the kiddos and he paint them together in the comfort of home? Many pottery painting places have the option of taking your pottery home to paint it and then you can bring it back to have it “fired”. Pretty awesome-and not too expensive! 
  • Handprint Wall Sign - Gorgeous handprint project for your home!

      Handprint Wall Sign! Courtesy of theidearoom.net

Handprint memories: This simplistic and inexpensive handprint wall sign is an adorable keepsake and an awesome addition to your home décor! Plus, it makes a fun Father’s Day activity for everyone to create together!  I know we’ll be diving into this one on Sunday! 


Looking for a fun Father's Day craft your kids can make? I've got exactly what you're looking for right here! Dad will love it!

Create Adorable Cards:

You don’t have to create these amazingly simple, yet darling cards ahead of time! The card pictured above is from homeschoolpreschool.net and is a FREE downloadable with easy steps! Kiddos can create this card or any others WITH dad right on Sunday (eliminates the stress of planning with so little time left and it includes Dad in on the fun! ) https://homeschoolpreschool.net/fathers-day-craft/ 

Here’s some quick links to materials you might find useful when creating some adorable Father’s Day cards/painting: 


Remind Him Why He’s So Amazing:

While this seems pretty obvious, I’ve  caught myself  forgetting to pause on this one. Let’s face it, the day can slip by (especially if you have little ones or a busy schedule) and sometimes we forget to stop and grab dad by the hand to let him know how you feel. Cards, outings and activities are all wonderful but sometime set aside while the littles are napping or when you have a moment alone to simply let him know why he’s so great can make a good day into an amazingly meaningful celebration. 

Spending Time Together: 

However your dad or special guy wants to celebrate his day, remember that the time spent together and focusing on your family is immeasurable. Anything from breakfast to a movie or story time at night, each moment shared is another memory to cherish. Just make certain that it’s time spent TOGETHER. It’s super easy to get sidetracked with the numerous items on always looming to-do lists-especially when it’s a Sunday. Our father’s Day tradition usually takes my husband out with my father-in-law and kiddos early in the morning on the golf course. I later meet up with them for breakfast/brunch on the golf course. We usually go home and hang out…which is perfect for my husband. A great balance of seeing his dad mixed with the littles. All while TOTALLY ignoring the five zillion things that need to get done at the house. It’s awesome-for everyone.  Whatever or wherever your Father’s Day takes you, remember:  snap lots of pictures together, steer clear of the “to-do” lists and make it about being together. 

Keeping it All So Simple: 


Whether this is his first “rodeo” or it’s his 20th Father’s Day, keep these key ideas in mind:

  • Keep the day about him-his choice- ALL day!
  • Remember to share some love by reminding him why he’s so amazing. 
  • Let him choose one activity or five! It’s his day.
  • Get crafty with a family based activity that doubles as an awesome keepsake.
  • Spending time together-YOUR time is what makes this day amazing. Skip the to-do lists.


How to Be More Productive- Every Single Day!

Ebates Coupons and Cash Back


Child, Girl, Young, Caucasian, Childhood, Daughter

Happy June everyone! I almost didn’t believe it was June until my kiddos, excited to flip the page on the calendar, reminded me. Wow-time flies…which brings us to this next post! Being home with the kiddos is a HUGE blessing that I am ever-so thankful for each day. With it, though, I’ve found that being productive has taken a major back seat. I am now a HUGE culprit of letting hours and days slip by without so much as cracking a look at anything on my foreboding to-do list. I mean, even with the best schedule, we get caught up in learning, play and LIFE that often by 7:30  I look back and feel a little like….

         a dog chasing it’s tail….Right, Arrow, Next

.

Even as we speak, I’m gingerly typing away on my keyboard, my littlest love sprawled across my lap on our couch in sound slumber. My time is limited, this I know, so I type fast, ignoring typos and incomplete sentences that I will have to tend to “later” (at o-dark-thirty). Sound kind of  familiar?

If you’re like me, you love,  LOVE, LOVE spending time with your littles. I mean, how awesome is it to get up each sunny morning and sit on the floor with your kiddos to play with trucks, Legos or construct a marble run? Pretty amazing I say. HOWEVER, if you’re also like me,there’s the insatious “to do list” looming some where in your cerebellum begging for you to tend to one of the five hundred items you’ve been unable to tackle.There are days were I have felt completely unproductive and the result: a VERY cranky mommy.

Most of us anxiously await that precious time of day that may allow you to ACTUALLY get one or (dare I say) two things done….it’s none other than-NAP TIME. Ah yes, that sacred time of day that no one but a parent could POSSIBLY understand. It allows your littles to dream away those pre-nap time crankies all while simultaneously allowing you to hack away at that list which keeps knocking on the door unanswered. With so much to do, how can you become more productive each day?

Balancing Act 101–writing with one hand!


My, Oh My How Time Does Fly…

Sitting here again today, it occurred to me that I’m probably not the only one who has ever wondered “WHAT DID I DO during that nap time?” Did I actually get anything done? I mean…aside from tiptoeing around picking up wooden blocks and trains? Say no more, sista -or brother–we FEEL you. How are those precious minutes,(or for some of you lucky ducks, HOURS), flying away without a hint of anything being done? I began to get so frustrated with myself that I actually started researching topics related to work-life balance. Especially those related to working at home with LITTLE ones…which, is a WHOLE other ball game. After contemplating the many layers of advice out there on the web, I finally discovered one thing that has actually WORKED for me: BLOCK SCHEDULING.

Block Scheduling 101

What is block scheduling and how can you implement it? Block scheduling, in it’s simplest form, is taking a birds eye view of your day and “blocking” out time frames for each goal that you have. There’s a specific start and stop time for each activity you’ve have lined up.  That means if your little love naps from 11:00 until 12:00 each day, you have the opportunity to create blocks of time for yourself within that hour! For example you could take that whole hour for one activity or by break it down into smaller increments to check off multiple things on your list!

Even though I’m a guinea pig when it comes to block scheduling as I’ve LITERALLY just started it….like yesterday…I’ve discovered a few things in my experimentation with block scheduling already. After initiating block scheduling the other day, (at least during one portion of my day), three amazing things happened:
a. I cleared that nagging list off my brain and on to paper.
b. I was able to achieve ONE item off of my list…don’t judge-all about baby steps here.
c. I felt relieved, energized and ready for the next adventure with my little one.

Below are  two ways you can implement this awesome technique to score some more YOU time:

Google-Getting it DONE

If you’re connected with Google in any way (through Gmail,Google Plus) the Google Calendar may be perfect for you! If not, skip down to the next block scheduling suggestion!)

With Google Calendar, you can connect every activity you have from your email to your calendar in one single application. What’s so great about Google?  Google Calendar seamlessly connects multiple areas of your day into one space AND blocks out times for you! Win-Win! 


Google

Google Calendar at Work!


If you still like the idea of writing your goals or  “to-do” lists down on paper first, you can check this awesome printable out:  Time Tracker Printable   I use this little sheet when planning a full week out is just too daunting. Simply print, write  and post it! Take each item you feel you want to do FOR that DAY or THOSE hours and get them down on paper! 

Happy Apps! Put that Smartphone or Computer to Work–FOR YOU!

Not everyone loves Google or uses it the way I do. Totally get it. One of my favorite blog sites, The Work at Home Woman, suggests using an App such as Toggl!. This is an amazing time-blocking app that features a timer, as well as additional tools to help you concentrate and apply the block schedule method. You can use the app with other planning tools or simply on it’s own. REMEMBER,  Use the app in conjunction with your other planning tools or on its own

Jumping into the Block Scheduling Routine!

To start kicking some major get-it-done goals on your to-do lists, Holly from The Work at Home Woman offers amazing  advice for pumping your way toward feeling more successful each day. Below are a couple of pointers: 

  1. PRIORITZE your Goals:  Start off each day by tackling the hardest item on you to-do list. REMEMBER this is about YOU; not what anyone else may deem as “difficult” or “grandiose”. For me, it’s searching for ways to increase my family’s income so we can vacation!
  2. PICK a System: Start by getting a system in place you like and WILL use. REMEMBER this is not A ONE-SIZE FITS ALL routine. Block scheduling follows a certain pattern for sure, but HOW you implement it is all up to you! 
  3. SCHEDULE Tasks at the Same Time EVERY DAY: We know this can get tricky; especially if you’re a stay at home mom balancing home life  and work. However, according to a post by conversionminded ,if you create time slots for the same types of things everyday, the more likely you will be to get into a routine with them, the more likely they will get done! 
  4. Do YOU time: Office time, housework and playdate time may very well be a large part of your day. However,  when it comes to block scheduling,  don’t forget that you need YOU time too. Whether you have an hour or a full eight to get your tasks done, schedule yourself breaks! In general, you’ll find some sanity and you’ll be more productive!  Put in that much needed walk/run or some other downtime for you to rejuvenate. 

Bottom line…

If you’re feeling overwhelmed and under achieved, take block scheduling out for a test drive! Worse case scenario, you lost an hour trying something new and, you’re one step close to figuring out what works!  I’m already feeling a little more in control and balanced… I’m now  tackling my New Year’s to do lists!  Whoooo HOOOOO!