5 Quick Ways to Simplify Your School Year

Get Rid of Mama Guilt: Self care is NOT selfish!


Self care

Is self-care something you THINK about but rarely take action on? You’re NOT alone!

It’s taken me quite a long time to understand that taking care of myself first is, well, necessary in order to serve others. I’ve always HEARD it, I’ve always understood the basic concept of self-care but it wasn’t until my little ones got out of the infant stages that I really began to digest what that meant.

Much of this dawned on me not as a result of my own breaking down into a ball on the floor (although that HAS happened before) it actually occurred to me while flight on a vaca with my family.

The flight attendant was going through the regular safety protocols and she went over the oxygen mask procedure.

Now, I’ve heard this one 1,000 times before: always put the oxygen mask on for yourself BEFORE assisting others and it always made sense to me BEFORE I had kids.

After I had my littles, I began to question whether or not I would even dream of helping myself first BEFORE racing to my kids.

Kind of a scary thought but I really wasn’t sure. 

This time, as she was describing, in detail, the significance of making sure you take care of yourself first, it really dawned on me…what good am I if I can’t breathe?

What good is it if I help my kids in any situation but I’m barely breathing (literally and figuratively).

I’m not sure where, when or why I began to think that my personal care was not as important as the care of others.

It’s not as if my mother or anyone else for that matter told me directly that I can’t shower before my kids take their bath or that I can’t go for a run instead of playing outside with my kids first. It was just understood: If I did something for ME, I was being, selfish.

I stepped off that flight feeling a bit flustered about this revelation but also feeling a bit relieved that I’ve finally understood why I needed to do what I needed to and in a simple statement figured out that wow:


Self-Care IS NOT Selfish.


Sounds ridiculous, doesn’t it? AS silly as it sounds, the more mom friends I speak to, the more and more this becomes an instantaneous reaction.

The guilt, the worry that you’re not being a “good enough” mom, the constant nagging in your head that there are 1,000,000 things to get done.

Here’s a little truth bomb: there will ALWAYS be 1,000,000 things to get done, and the kids—they are actually going to be GREAT whilst you go and have some you time every. day.

Whether you have infants, toddlers, teens or something in between all of it (we have a mix of all of them pretty much!), it’s time to start putting you first so that you can be the best YOU possible.

An empty cup has NOTHING left to pour out.

You’ve got to fill your cup EVERY. SINGLE. DAY! 


Self Care is not selfish take time for you


Make self-care a MUST and you will start to FEEL your stress melt away and you’ll be more present in your life and your kiddos lives! Good feelings all around!

Here are 3 quick ideas to get you going on grabbing back a little bit of YOU time so that you can fill your cup—STARTING NOW


  1. Start SMALL and start FIRST THING. Because NO act for yourself is TOO small. Whether you’re a busy new mom or an overwhelmed mom of toddlers and teens, small moments make all the difference.

The other day, I simply went to Starbucks. Really. I went to Starbucks alone for 10 minutes even though I was “expected” to be back home. I did it because I wanted and needed a moment and you know what? It felt Great!

Ask yourself: What is one “small” thing I can do NOW—TODAY—that will help fill up my cup?


  1. Switch to SELF. Make YOU a part of your daily routine and start in the morning. Maybe you have a morning routine or maybe you don’t (as a new mom—my routine was FIND TIME TO SLEEP!). Whether it’s 10 minutes or an hour or more, TAKE YOU TIME every day. You can DO it and the results will be empowering—I

I listen to Mel Robbins , Tony Robbins and JUST recently, Kathrin Zenkina. 

Just about every day I choose one to listen to for anywhere between 10 and 20 minutes a day! 

I usually listen to their FREE Youtube videos OR Podcasts while driving or on a run.

You can listen while doing just about anything during what’s called “NET” time (NO EXTRA TIME).

My dose of “morning magic” varies as my days with my kiddos VARY (especially lately!) and yours will too! 

Mel Robbins eluded to this perfectly when she said at one time in her life, her morning routine lasted about an hour. (WOWSA)

Currently, she spends 10 minutes for herself each morning–just because it’s the season of life she’s in. 

In other words: GIVE YOURSELF SOME GRACE! 

I think some of us mamas set our expectations for self-care so high that we throw our hands in the air and don’t even start. SO:

Start with 3o seconds or ten minutes but…JUST START.

Change your standards because different seasons in life bring different things.

This doesn’t mean we throw away self-care.

TAKE the time…any time…for YOU—TODAY MAMA!

First thing in the morning –BEFORE all OTHER distractions of life come in:

Ask yourself: What is my MUST (your activity) that I will do for myself today?


  1. Find activities you love to do—get back to YOU: Pick one of these activities to start with or add on your own but make sure it’s something you truly LOVE to do. Otherwise, it will become more like a chore than self-care and you’ll fall back out of taking care of AND being aware of you!


Here are a few of mine that I love (many of these are brand new to me and I’ve really come to enjoy them!)

  1. Grab a journal or piece of paper and write down your goals, what you’re grateful for each day , something positive you would like to tell yourself, write down things you love to do!
  2. Pray, meditate, just sit and be still. I do this every day. Sometimes it’s for 30 seconds. Sometimes, it’s for ten minutes. I don’t pressure myself on time…after all, it’s all about ME!
  3. Move your BODY! Time to get up and get moving. This doesn’t have to be a big EVENT! Get up, get out and get moving…even if it’s for a walk down the street and back. Ask someone to watch the kids, wait for your partner to come home, BUT make it a MUST.
  4. Drink water. Start with water…because it’s sooo needed! Be intentional with what you put in your body. This small thing will help you gain momentum to feel more empowered.
  5. READ! I’m starting off with reading ten pages of SOMETHING every day. I haven’t read an “adult” book since 2010. Kid. You. NOT. CRAZY—right? It’s not that I don’t enjoy reading, it’s that it hasn’t been a must for me to do. UNTIL NOW!

That’s it! NOW GO!

Find 10 minutes today.

Start writing what YOU love to do down (I know its crazy right…because it’s not necessarily just storytime or sing-alongs—it’s the other things you LOVE to do!).

Share with us below or send me an email! 

What are you doing today to fill your cup? Share something below! I’m going for a RUN! Woot-Woot!  

If you love this post, research shows you might also love: 
How to be More Productive Every Single Day

What to pack your kiddos for lunch! 

5 Quick Ways to Simplify the School Year

3 Mistakes Parents Make When Packing School Lunches PLUS What To Do Instead!

It’s back to school time and if you pack lunches for your kiddos, there’s nothing more stressful than trying to decide on the BEST foods to pack for those long school days.

Thankfully, Jenn Espinosa-Goswami from Weightless Chronicles is here on The Running Mama to help ALL of us WIN  the battle of the “box” (lunch-box that is!) 


You don’t want your kid to eat questionable school lunches, so you pack a healthy home lunch. Yet, is that home lunch providing your child with everything they need for a super day?


Read more on how to make superior sandwiches, put the “pow!” in produce, and deter deceptive drinks (plus recipes).


Back in 2017, I decided to pack school lunches for my two daughters. As a health coach, you would think it would be easy, right?

It’s not as if I can’t figure out how to create a healthy and balanced meal, how to please a picky palate, or even how to bake healthier treats.

Despite all of this, I would deal with hangry children on the way home from school. Children who either a) refused to eat what I packed for them –or– b) preferred to eat all their “treats” instead of the healthier options.

There were even times when I discovered a rotting piece of fruit at the bottom of their school bag at the end of the year.

Did I mention that my two daughters prefer to eat exactly opposite of each other? While one leans towards more standard American fare such as bunless hot dogs and hamburgers, my other daughter doesn’t eat beef, and loves her carbs.

What’s a busy mom to do? Well, I did what any time-starved mom of picky kids would do. I defaulted to the classic school lunch ideas, such as a sandwich, piece of fruit, potato chips and juice. Convenient, grab-and-go items that didn’t break my budget or end up in the trash at the end of the day.

If I was less persistent, I could have simply given them lunch money and called it a day. Yet, this fascinating article from the New York Times shares how kids hate how school lunches taste under the new regulations of the Healthy, Hunger-Free Kids Act.

The truth is- I care how my kids eat when they’re not at home. Maybe that means I’m a control freak, maybe it means I’m all too familiar with the loopholes in school lunches that enabled my own childhood obesity, or maybe it just means I want my kids to embrace a wider variety of foods that they actually love to eat.

Plus, I want my kids to have a superhero kind of day at school. One where they feel strong, smart and fast (details on how to pack food for your own Superhero)


3 Mistakes Parents Make Packing School Lunches 

Balance, Balance BALANCE: What a Great Lunch SHOULD Look Like: 


Before we dive into the 3 mistakes most parents make when packing lunch, let’s talk about what a balanced meal actually looks like.

Many school lunches are based on the concepts behind MyPlate. MyPlate is the USDA’s guide to healthy eating and is frequently taught in schools as well as informs the menu for most hot school lunches. Previously, MyPlate was known as a Food Pyramid.

MyPlate encourages Americans to choose from 5 very colorful food groups in order to eat a healthy and balanced meal. Unfortunately, this is not a very helpful or accurate guide.

When I asked my Facebook community to identify what they typically pack in their kid’s school lunch, this seems to be the same thought process- pull from each of these 5 food groups for a healthy, balanced meal.

First, they make sure their kid has a choice of fruit and vegetables. Then, they pepper in some sort of grain (unless they are gluten-free). And, last, they add in whatever protein their kid will actually eat.

For those super parents who have taught their children as young as 6 to pack their OWN school lunch, their kids simply grab and go from containers marked with each of these categories.

Notice: My Plate recommends a separate serving of dairy. While few parents I asked include milk in their kid’s cold lunch, it is a mandatory offering not just in school lunches, but also in every kid’s meal in restaurants.

While I am not vegan, there is no nutritional requirement for children to drink milk every day as part of a balanced meal. In fact, there are much healthier sources of calcium that are easier for our bodies to break down and absorb, such as spinach, kale and chia seeds.

What is actually wrong with MyPlate? Over 3/4 of each meal should be full of carbohydrates!

Sure, this might be appropriate for a very active and growing child, but perhaps not for an inactive child who tends to eat more grains than produce. Or a child who spends the average 3 hours a day on a device or in front of a screen.

Also, My Plate neglects the fat. All of us need healthy sources of fat for healthy brains. As our kids spend most of their time in school learning new and unfamiliar concepts, they certainly can benefit from more brain food! Yet, this very important macronutrient is frequently missing from most recommendations.

Now we know why the MyPlate recommendations might not be particularly balanced, how does this change how you currently pack a school lunch?

Here is the typical home lunch:

  • Sandwich
  • Fruit and/or Veggie
  • Sweet or savory snacks
  • Milk/Juice

Now let’s walk through 3 common mistakes parents make when packing this typical lunch (and what to do instead!).


3 Mistakes Parents make packing school lunches and how to pack healthy school lunches or what to pack instead

3 Mistakes Parents Make When Packing School Lunches (and what you can do instead!):


Sandwich Secrets

Did you know that the average American will eat up to 3,000 PB&J sandwiches in their lifetime?

Even if you avoid peanut butter, due to allergies in your kid’s classroom, you might find yourself packing convenience foods like Lunchables or Uncrustables.

Unfortunately, Lunchables can have up to 67 ingredients in one box for a simple meat and cheese plate. Sounds rather crazy, doesn’t it? Uncrustables is not far behind and includes many trans fats and corn syrup.

OK, so you do the right thing and create your own PB&J sandwich on whole-grain bread.

At least you know what ingredients are in there. Strictly speaking, when we look at the macronutrient breakdown of the classic PB&J sandwich, you have carbs (bread and jelly) and a bit of protein (peanut butter).

While the fiber in the whole grain bread will slow down the digestion of this sando, it’s mostly carbs. Add a side of fruit and juice box, and your kid will be falling asleep by 2.

This doesn’t mean you can’t feed your kid PB&J, but it may not be your healthiest or most balanced go-to. Instead, you could use peanut butter as a dip for apple slices, or use real strawberries instead of jam.

How about meat and cheese with crackers? Most deli lunch meats contain high amounts of sodium and nitrates. Also, the World Health Organization (WHO) released a study in 2015 linking high consumption of processed meats to cancer.

Also, most crackers are full of ingredients you may wish to avoid, even whole grain and organic ones. Try these 5 ingredient, super-easy rosemary beet crackers or nut-free apple pie crackers instead!

When it comes to sandwiches, try whole-grain flatbreads or homemade veggie wraps, and use shredded meats from your own slow cooker. Better yet, think beyond the sandwich, and go for meatballs or veggies with dips. 

Switch from the sandwich mistake in packing your kiddos school lunches and gain back your energic kiddo! 

Powerful Produce

Most parents require that their children have at least one fruit or veggie in their home lunch.

And, most parents shake their head when their kid brings back ONLY the fruit or veggie. You know, because they “ran out time” to eat.

Hey, I feel your pain. After all, I declared at the wise age of 18 that I would never eat another green veggie again!

You are doing your part by buying the healthy produce, and even chopping and prepping it into snack-size backs.

The secret ingredient is to make the produce fun or unexpected!

  • Instead of plain carrot sticks or celery, can you include a yogurt-based dip or nut butter
  • Instead of beef or turkey meatballs, try these veggie meatballs. Extra credit for spearing them with colorful toothpicks for convenience.
  • Instead of steamed, try making baked or sauteed “fritters” out of them, like these bacon and spaghetti squash
  • Instead of chips made from potatoes, try homemade zucchini chips, or baked parsnip or yucca fries.
  • Instead of room temp grapes or bananas, try freezing them (slice the bananas first)
  • Instead of sliced strawberries or berries, put them in this frozen yogurt bark
  • Instead of whole fruit, make fruit kebabs

Be very slow and cautious with introducing these new ideas to your kids. After all, it can take up to 8 tries before a kid’s picky palate accepts these new adaptations.

Better yet, have them make these items WITH you. They may even come up with their own ideas.

Deceiving Drinks

Whoever decided that our kids need to load up on calorie-laden, sugar-rich drinks has created a monster!

I’m not even joking. I can’t tell you how many women I work with who struggle with drinking enough water to hydrate properly throughout the day. Often, this unhealthy habit often starts in childhood, and especially as we replace our childhood juice or milk with more adult pleasures like wine or lattes.

Especially if your kid has been in any sort of team sports- you have to work REALLY hard to avoid juices, sports drinks, or (God forbid) energy drinks!

But, you are aware of the dangers of sugar, and make sure to pack only 100% and organic juice or skim milk. That’s healthy, right?

Not really.

Juice is often full of artificial sweeteners, colors, and calories. None of which any child needs on a daily basis. In my own experience, my daughter will often drink her juice before she eats anything, which means she might crash right after lunch.

Skim milk may not be doing your child any favors, either. Whenever fat is removed from a food, sugar is often added. In this study published in Time, people who ate/drank full-fat dairy had a 46% lower risk of developing diabetes.

Water is the best drink for your child. Use a fun, colorful bottle with a straw, a stainless steel bottle that keeps the water nicely chilled, or even infuse your child’s water with some fresh fruit.


Conclusion: 

Now that you know the benefits of using a macro-based plan to packing your kid’s lunch, and tons of strategies to avoid common mistakes, you can confidently pack a balanced and yummy lunch that your kids will actually enjoy!


Research shows that if you LOVE this article on The Running Mama, you’ll ALSO LOVE these: 


All About the Author:Back to School Post School Lunches

Meet Jenn! 

Jenn Espinosa-Goswami has spent her entire life releasing her inner Wonder Woman, beginning with her 100-pound weight loss as a young college student and most recently as a marathon runner. Her passion as a speaker and health coach is to facilitate body bliss for every woman and their families.

A member of the National Weight Control Registry, her 100-pound weight loss story has been featured on Women’s Health, Prevention, Reader’s Digest, First for Women magazine, and Fox.

When not presenting motivational presentations to brands such as Target, Wells Fargo and TOPS in Minneapolis, she blogs at www.weightlesschronicles.com.  Jennifer is a wife and mother to two beautiful daughters.  You may find her dancing in her living room with her girls or enjoying a bean burrito.

3 Signs that Indicate You Need To Break Up With Your Child’s School

3 signs that indicate you need to break up with your child's school

Ah…SUMMER! For those of us that have school aged kiddos, summer signals  a time of sheer relaxation: relaxed moods, relaxed schedules and relaxed minds. For some parents, it also offers a chance to reflect on the school year that has past and look onward to the approaching year. AND if you’ve had less than a stellar experience with your child’s current school, you may find yourself questioning what to do next.

How do you know you should start the new school year at a new school? There are 3 signs that indicate you need to break up with your child’s school…check them out before they check in for the year. 

**”BY THE WAY~”Our Disclaimer: we are not physicians or professionals. If you think your child is in danger in any way, please contact a professional immediately!

Questioning the “System”

Maybe you’ve been there: your little love comes home from school to declare that he or she doesn’t want to go back…ever. You analyze all of the possible reasons: Is it avoidance? A social problem? The teacher? You try to become a sleuth, (of sorts), in order to figure out what’s going on and you may discover the root of the issue or… you may not. (at least not instantaneously).  All of a sudden, the security you felt in your decision to send your child to that school may be shaken. 

Or, perhaps, the doubt surrounding school systems starts with you.  Maybe questions begin to stir regarding the teacher’s knowledge base or, as you slowly watch communication dwindle and lack luster learning activities pour in, you discover  your definition of “quality education” compared to that of the administration greatly differ.

Perhaps you continually feel a sense that the environment is more concerned with numbers than a child’s genuine love of learning.  Whatever your reason for questioning your child’s educational environment, know that you’re not alone. More and more parents and caregivers are placing more time and, (in some cases), more money into their children’s education. 

“When the atmosphere encourages learning, the learning is inevitable.”
― Elizabeth Foss

“GET TO CLASS” The Dreaded Front Office Scenario

For some,  it may be the one last “little” thing that breaks your nerves about your child’s school, for others, it could be a gradual culmination over time. For us, it got to the point where we simply DREADED dropping our daughter off to school each day.

Between a poor classroom teacher, behaviors in the classroom that were continuing to effect her and, I kid you not, the  “ladies” in the front office, were were done by October.

Let’s, for one moment, discuss the front office. I know, it seems like a weird aspect to bring up but, let me explain to you why this was the final factor in pulling our daughter out of her current school situation.

We bring our daughter into school most days. Each and every day when we walked her in (albeit we were late at times), these “front office faces”, were clearly annoyed by us and/or our daughter.

We weren’t looking for some grandiose welcoming committee. A simple “good morning/how are you —–” would’ve been enough to make us and our daughter feel welcome. 

Instead, we were greeted with glares, or hardly even a look. A stern hand would flash a flamingo pink pass to our daughter joined with a short, irritated, “GET TO CLASS” statement. The rude behavior proceeded especially if she didn’t “get to class” right away.

There is one woman who would, despite the fact that she could see my daughter hugging and kissing her little brother, who would repeatedly speak to my daughter terribly–often raising her voice to tell her to “GET TO CLASS” over and over again–despite the fact that she was simply trying to say goodbye to us. How awful is that? 

It got to the point where I began to allow my daughter to wait in the hall whilst I retrieved her pass from these ladies. I mean, who wants to start their day with that type of a greeting?

It set a tone for the whole day and, in our opinion, spoke VOLUMES about the entire school environment.

Our daughter is six years old, not twenty. She doesn’t “GET TO CLASS”. Why should I, a parent, be the one to point out this terrible behavior from an adult who is, in some cases, the first adult that a child or another parent interacts with once they get into the school. That did it for us. 

So–lesson learned here? Whether it’s considered a “major” issue such as bullying or a teacher that is lack luster OR if it’s a “minor” issue that’s now affecting your child every day, it may be time to close the doors on that school—permanently. 

Don’t feel that your “issue” is too small. Point being: nothing is a “small” issue when it comes to your child’s happiness, comfort and environment to which they spend so much of their time. If your child is unhappy for one OR all of the reasons we’ve discussed, (or others), don’t standby.

Know your rights, speak for your child. 

3 signs that indicate you need to break up with your child's school

Before the Bell Rings: What’s Next

If you’re having second thoughts about your town or city’s school system- stop and consider your options. Does it mean you should immediately change your child to a completely different school? Of course not. Should you start to reconsider what type of schooling is best for your family? Absolutely.

Blindly going into any educational system without questioning it should be a thing of the past. If we think about it, our children spend 6.5 to 7 hours plus per day at school. That’s approximately 35 hours per week away from home–sometimes more.

With your children clocking so many hours in their school environment, it’s extremely important that their school is meeting their needs academically, socially, emotionally and physically–every day

 Everyone has their opinions on education–it might be time to start listening to your own voice, (and your child’s) to decide what’s best for your family. Here’s some helpful tips: 

It's almost back to school! If you're uncertain about your child's current school...you're not alone! Check these signs that show you should start this new school year at a NEW school!3 Signs that Tell You to BREAK UP With Your Child’s School:

3 signs that indicate you should break up with your child's school

1. Your Child Isn’t Being Challenged at His or Her Level:

This was a BIG one for us. Our daughter has always performed above and beyond what one would “expect” for her age. From physical milestones (walking at 8 months) to academic milestones: (she knew her uppercase/lowercase letters at age two and was reading a little before her third birthday), she’s always loved learning and seemed to soak up every little tidbit of information.

She’s also an excellent “rule follower”.

Which meant, that if we didn’t advocate for her, she would simply “sit” in her classroom, (regardless of the lack of differentiation), and “learn” like her peers. NOT what we wanted AT ALL. 

Then there’s the other end. If you’re child is “expressing” themselves during class by acting out…the root cause could be sheer boredom. 

When an administration and/or teacher doesn’t differentiate, the results are devastating for students who are above the “curve”.  

I am, however, concerned about the general culture at public schools—at least at the ones I’ve seen—of disengagement and compulsory learning. So when it comes to my daughter, I opt to invest a little more—to ensure she’s immersed in a community where it’s acceptable, and even admirable, to show natural enthusiasm for knowledge.–Michael  Godsey, The Atlantic

change schools

2. Your Child Isn’t Thriving Either Socially or Emotionally

As children, we’ve all faced uncomfortable situations at school where students or, perhaps even teachers, were simply not behaving in a way that made us feel welcome.

Learning won’t and can’t happen in an uncomfortable environment.

This was the next factor that broke our trust in our daughter’s school.  The environment was not only disengaging but unfriendly and not representative of what we would consider “a place where kindness and learning go hand in hand”.

What’s important here is to make sure we, as parents, really listen to our kids.

Here’s where you should draw the line:

  • Your child is being bullied (and administration has not rectified the situation)
  • Despite conversations with your child’s teacher, there is little or no follow through.  
  • The classroom environment is not conducive to learning (i.e. behavioral management by teacher is questionable, the environment lacks structure 
  • Communication between home and school is sparse or non-existent (your finding more things out about classroom situations from your child rather than the adults in charge)
  • You or your child feels unwelcome. Don’t settle for anything when it comes to your child’s education. Especially when it comes to how you or your child feels when they enter that building EVERY day. 

Bottom Line: ALL children love to learn.  It is the responsibility of the adults who are leading them to help them succeed.

Make no mistake about that. 

Unschooling Quotes by Albert Einstein and Others

Picture and Quote courtesy of https://www.diygenius.com/unschooling-quotes/

3. Your Child Loses Interest in Going to School 

Ok. We’ve all been there. Our  jobs, school, maybe even at sporting events. There are simply “those days” where we don’t want to GO! However, you know your child best, and if all of a sudden your child’s behavior is changing without obvious reasons…it’s time to take a closer look.

Afterall, many times kids theselves can’t pinpoint what’s truly going on–all they know is that they want the situation to END. 

While there are many more signs, we wanted to highlight a few that might easily be passed off as “having a bad day”.Here’s some signs you can look out for:

*Your child refuses to get up for school and/or often complains about an illness you’ve looked into.

*He or she suddenly loses interest in activities he or she once loved.

*Your child becomes quiet or unwilling to discuss school. 

*He or she doesn’t want to attend certain portions of the school day (i.e. recess, lunch or other activities)

*Your child stops eating at school or at home.

***Please NOTE: Some of these signs can be an indication of a serious problem or that your child is in danger. The above are possible indication–as always– please contact a physician or professional for help.

Warning Signs that Indicate you should change your chiid's school

Get Out When It’s NOT Right:

Ultimately, you know your child. Before they step on that school bus this coming fall, evaluate the past school year. Was something just “off”? What about the teacher, the administration, the overall environment?  Go with how you feel and put a check mark next to these warning signs to double check the facts:

1.Your child is withdrawing/behaving uncharacteristically (not wanting to get out of bed was a sign from our daughter).

2.Lack of communication from school (you’re finding out more from your child than you are from the adults in charge–ANOTHER big one for us)

3.Teacher engagement is lack luster (again, another warning sign).

4.Administration (principals and even Superintendents “speak well” but perform terribly on making significant, positive changes. 

ALL children love to learn.  It is the responsibility of the adults who are leading them to help them succeed. Make no mistake about that.

DON’T Be AFRAID to BE DIFFERENT 

While many people are herded through one type of “system” or another, there’s something even more important to be recognized here: 

That there are vast choices when it comes to education. There are many different thoughts on schooling to be explored if the public education system or any system is NOT working for you or your child. 

Homeschooling, private or Montessori schools offer other ways of thinking and educating.

We are the best advocates for our kiddos. Learning, at ANY age, should be fun, engaging and enjoyable. We can all ensure that our kiddos have the best experience possible simply by tuning into their needs.

We’re All in the Same Boat

Do we know where our children will be for the 2018 school year yet? Absolutely not!  What we  ABSOLUTELY DO know is that we aren’t allowing our daughter or son to be exposed to an environment that represents the opposite of what we feel promotes an  authentic love of learning. 

Neither should you. There are choices. 

As for that terrible teacher our daughter had from last school year–she’s no longer with that school system. Hmmmmmm…….

Questioning your child’s school or the educational system? Have feedback for others who are? We would LOVE to hear from you!

Post a Comment Below! 

Research shows that if you love this post you’ll also love….

*Simple Summer Fun Activities

*3 Awesome Water Play Activities 

Looking for a chance to post your AWESOME content on The Running Mama? Check out how to become a GUEST BLOGGER! 

Looking for AWESOME Back to School Supplies, Gear and/or Products?

Below are some awesome products we’ve tried and WE LOVE! These are sure to jump start you into the new school year!

(*By the way–the links below are affiliate links which means The Running Mama will receive a commission from them). 

Change schools

Simple Summer Fun Activities!


Simply Fun Summer Activities!

Whether the kiddos are in camp and you’re in search of next week’s plan, or you’re on the downswing from your Fourth of July vacation,  we’ve uncovered three amazingly simple summer fun activities to keep the kiddos busy on one or several of your upcoming summer days! 

FYI! We use Affiliate Links Below! Read More about this Here

Small disclaimer: Please use discretion when completing these activities with children 4 and under. Adult supervision is required for all of these activities, regardless of ages involved! 

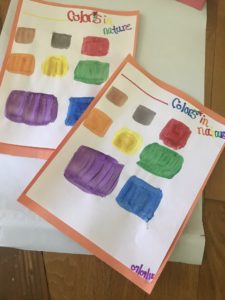
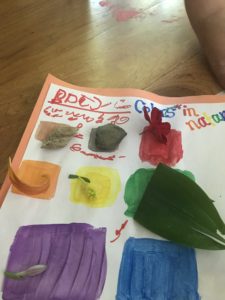
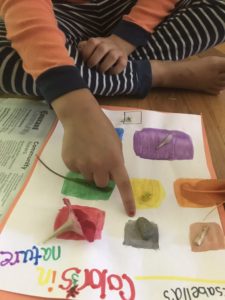
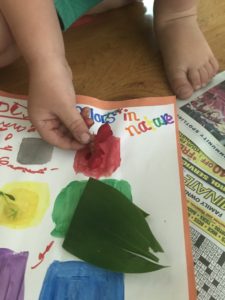
Colorful Nature Scavenger Hunt! All the Colors of Nature~A Scavenger Hunt

This was sooo much fun and took about 5 minutes to create! Win-Win! 

*Heads up! There are affiliate links below! You can read more about that here.

Materials:

  • Construction paper (used as a frame for white paper—optional)
  • White paper 
  • Markers, colored pencils or paint (I used paint)
  • Small baggie for collecting scavenger hunt items
  • A backyard or outdoor space
  • Small prize (optional of course) I gave my kiddos a cool treat (Italian Ice) as their prize!

That’s it! I created the templates ahead of time for this scavenger hunt but you can certainly have your kiddos create these as well! 

Directions: You can read a book about colors (the one below is a FAVORITE of ours) or dive in! Here are some pointers when starting this scavenger hunt:

  • What is this scavenger hunt  all about?
  • After some guesses, you can further their thinking by asking them to look out the window and describe what they see (they will probably say grass, sky, flowers, trees, etc).
  • Ask your them to look closely at the colors of nature and describe what they see. 
  • Explain that nature is full of color and we often forget it’s even there! Today, they will take a closer look at the amazing colors of nature!

Let them know they can fill their bag with as many examples of colors to fill in their charts as possible! 

If you’re kiddos get “stuck” during the hunt, you can certainly give them hints (I had to help out with purple and blue)! 

Post Hunt: 

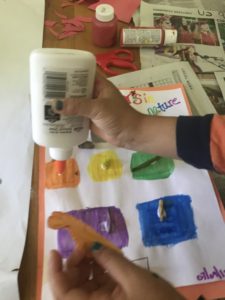
We headed back inside, broke out the Elmer’s School Glue and attached our nature treasures! Such fun! 

Nature Scavenger Hunt!


Paint with glueWith food coloring

Simple Summer Fun Activity # 2~ Salt Art! 

These simple summer fun activities are such a blast-this one is no exception! We originally found this one on Pinterest (of course).Here are the basic materials (NO worries if you don’t have some of these…we’ll get to that).

Materials:

  • Salt or sugar (salt works best)
  • Watercolor paints OR food coloring!  If not–water down other kid-friendly paint!
  • Elmer’s Glue (or any glue that has a small tip tube–if not–see our little shortcut below!)
  • Thicker paper like construction paper or card stock…BUT if not, you can use thinner paper (i.e. paper you use for your printer).With thinner paper…the design won’t last because the paper is too thin…but still fun to create!

Here’s a shopping guide for these materials: 


                      Now, let me preface this with the fact that we’ve tried this two or three different ways and we’ve found out a few different things along the way…

Shortcuts IF You Don’t Have Some of the Materials:

  • IF you don’t have salt, you can try sugar….but it may not work AS well considering the granules are a bit bigger (note firework picture below)
  • IF you don’t have white Elmer’s glue, you can try tacky glue…(which we used with popsicle sticks) but it may not make those fine glue lines like the Elmer’s (again see the fireworks we made below)
  • IF you don’t have thicker construction paper  the salt art may not hold up as well…as we tried on thinner paper in the pictures shown and, although it’s pretty cool, it won’t last in terms of keeping the shape of the art for long

    Salt Art!We didn’t have Elmer’s glue…but that didn’t stop us! 
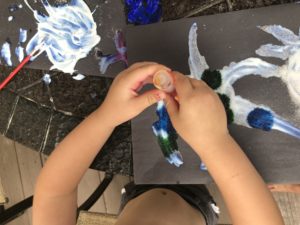
     

Sugar experimentOur first experiment with sugar and food coloring…came out great!


STILL super fun and a great “experiment” on how water absorption works!  Here are some easy pointers you’ll want for this:


  • Find a space…we did this activity on the floor with newspaper–but outside on the driveway is awesome too!
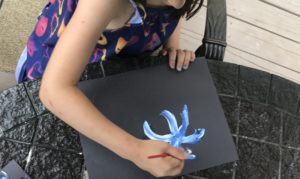
  • Use a marker or “free draw” with the glue whatever design you’d like! Fireworks, flowers, animals…let your kiddos get creative.
  • Pour salt over glue
  • Pick watercolor…be certain there’s enough water and color on the brush
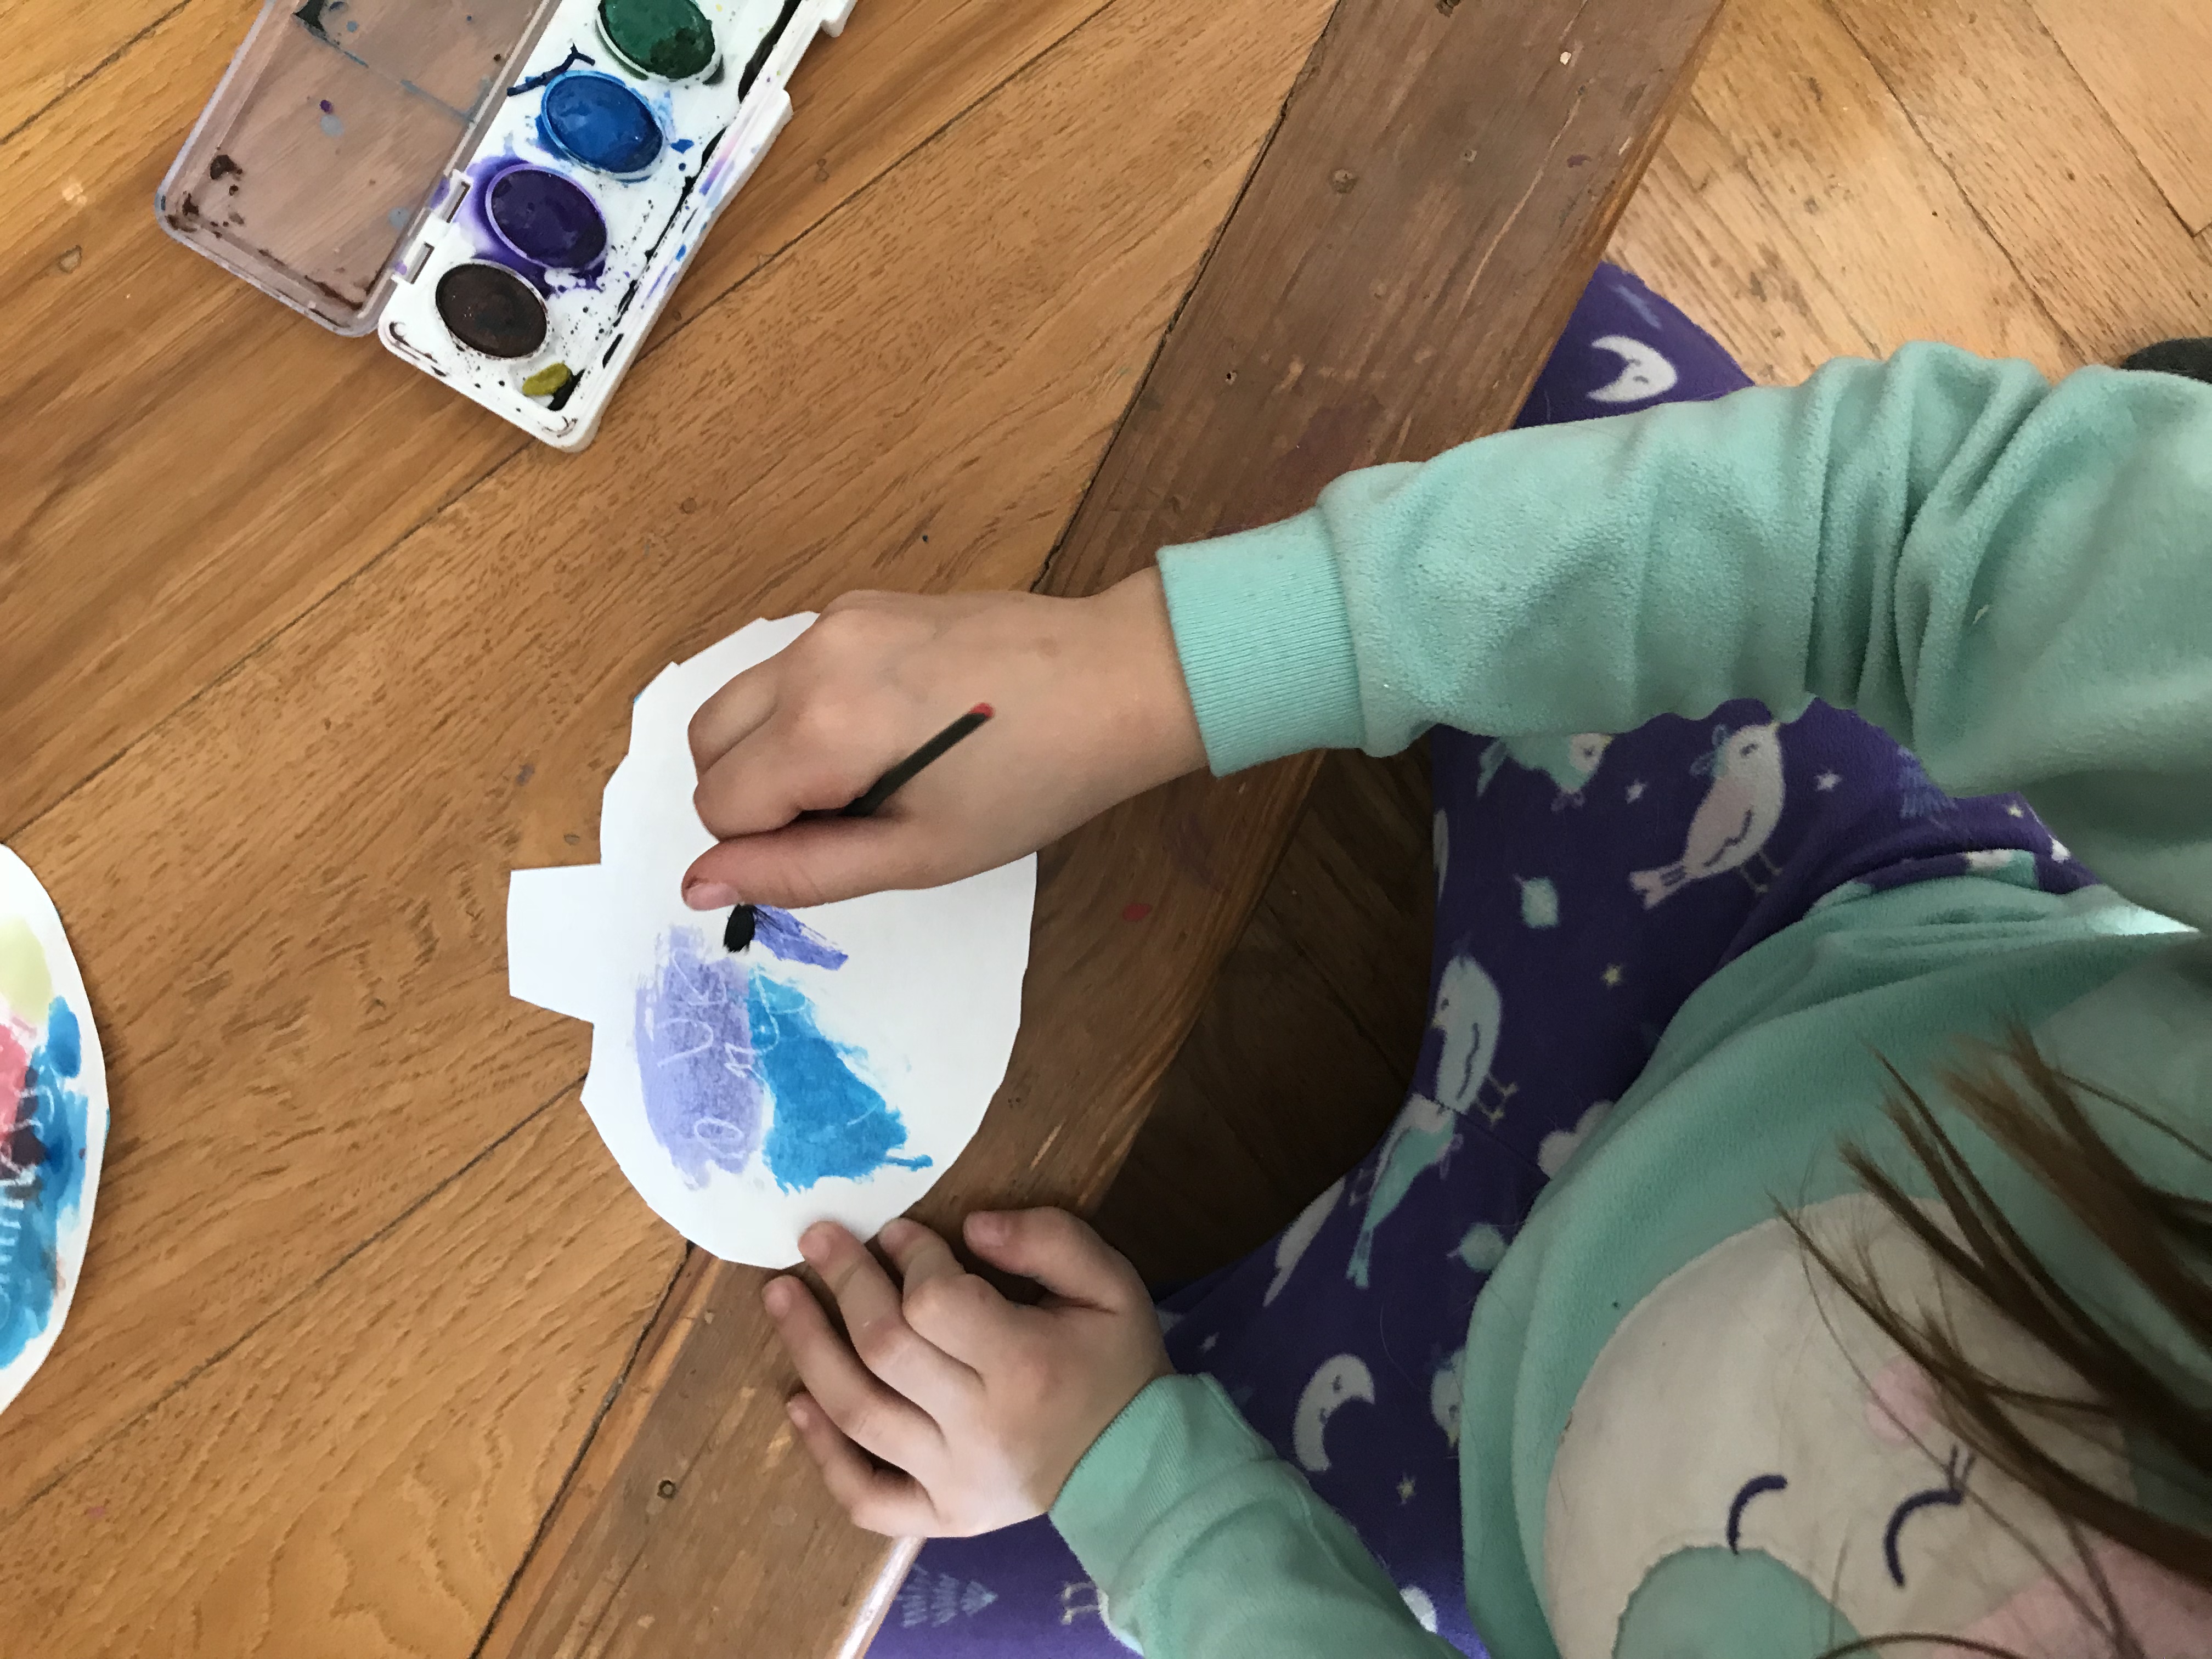
  • LIGHTLY touch the tip of the paintbrush to the salt and….boom! The color attaches itself to the salt and spreads….soooo cool! 

Check out how we did it below:

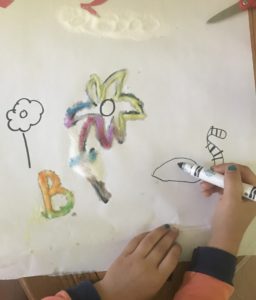
Step One...draw! We used marker…which ran but was easier for our kiddos!

Our daughter loves to draw her ideas out first!
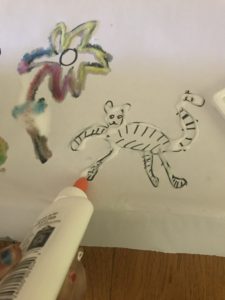
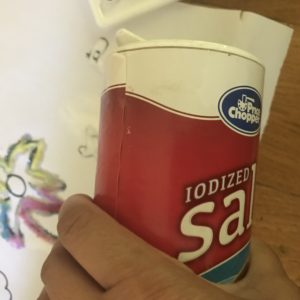
 

Step Two: Outline with Glue! 

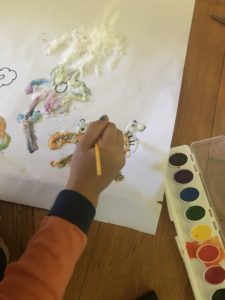
Step Two: Add Salt! 

salt


Step Three: Add Water Color or Food Coloring! 


left arrowAdd Water Color Paints or Food                                                                                                                                                      Coloring and–WOW!


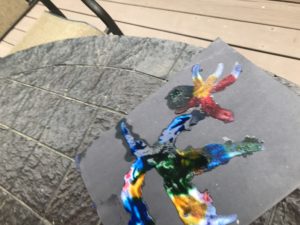
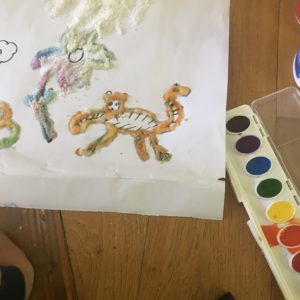
                                                                                 Finished! 

Here’s the finished piece above. Super adorable…now if I could only find a way to preserve it! After an hour or more, the marker faded/ran and the water bled into the paper. If you have any ideas…please comment below! 


Simple Summer Fun Activities Everyone takes part!

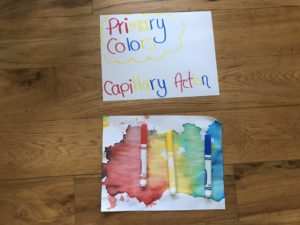
The Walking Rainbow

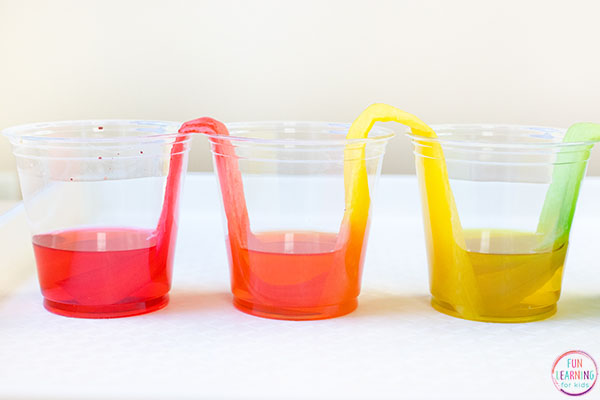
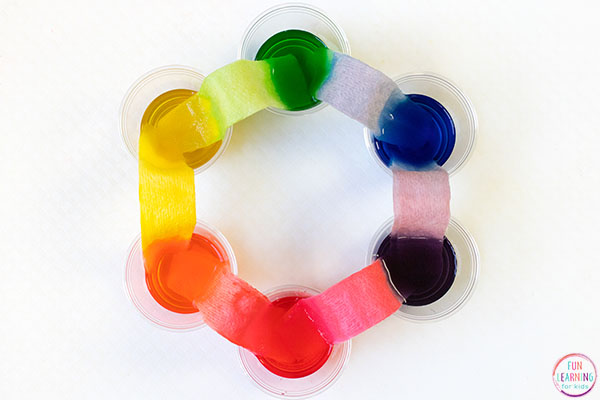
Ok–this simple summer fun activity  is by far the COOLEST!  We were amazed at  how quickly the water and color traveled through the paper towels!

This goes along perfectly when discussing the idea of absorption (if you wanted to make a lesson out of it you TOTALLY can), this “walking rainbow” is perfect for a warm day!  I completed it with a six year old AND a three year old…so no worries on age ranges here…it’s perfect for everyone. It not only demonstrates how water absorbs, but it also shows how, when color is added to water, the color molecules move with the water! SOOOO cool! Check it out: 

Summer Walking Rainbow learning

Used a piece of paper after to dry the paper towels on and created artwork with it!

Here’s the Educational Piece: 

For your little ones learning about colors: 

Primary Colors: There are 3 primary colors–red, yellow and blue! These are called primary because they are used to create other colors! 

For older kiddos ( as well as little ones! You can still review what primary colors with older ones as well!)

Capillary Action: When liquid (like water) moves through a source (like a paper towel) against gravity. 


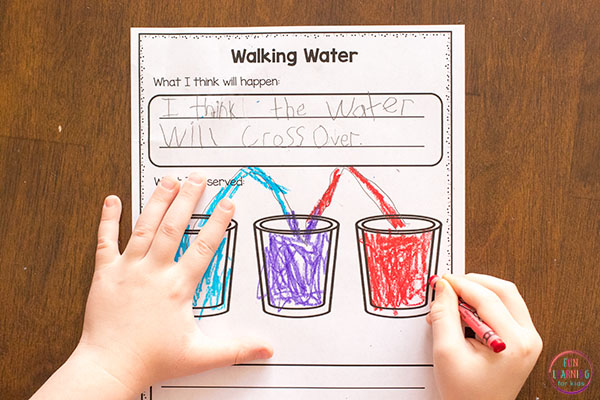
There is also this ADORABLE worksheet from Fun Learning for Kids: Walking water science recording sheets.

Here’s the link to grab the FREE worksheet: https://funlearningforkids.com/rainbow-walking-water-science-experiment-kids/ 


EasyPeasy Materials You Will Need For This: 

  • SEVEN Clear, wide mouth cups
  • Food coloring (primary colors)
  • Water
  • 7 or more Paper towel sheets–we cut long enough pieces to fit from one cup into another.

Question to Ask Your Kiddos: 

  • What do you think will happen to the paper towel once it’s in water?
  • What do you think will happen to the water?
  • What is happening now?
  • Why do you think the colors are changing?
  • Why might the water be able to move up against gravity like that?

How this Science Experiment Works:

The water moves up the paper towels through a process called capillary action. The paper towel is made from fibers and the water is able to travel through the gaps in the fibers.

The gaps in the paper towel act like capillary tubes and pull the water upward.This is what helps water climb from a plant’s roots to the leaves at the top of the plant or tree.


The water is able to move upward against gravity because of the attractive forces between the water and the fibers in the paper towel.

STEPS:

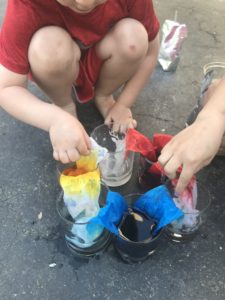
1. Place 7 cups in a circle or in a row  and pour water in the 1st, 3rd, 5th, and 7th cup. I poured them almost all the way full. I have since heard that fuller is better.

2.  Add 5 drops of red food coloring to the 1st cup and the 7th cup.

3.Add 5 drops of yellow food coloring to the 3rd cup.

4.  Add 5 drops of blue food coloring to the 5th cup.

5.  Take a half sheet of paper towel and fold so they look like the picture below. 

6.  Trim off some of the length so it’s not sticking out of the cup too high—the water and color will “walk” quicker this way! 

Walking Rainbow-The Running Mama

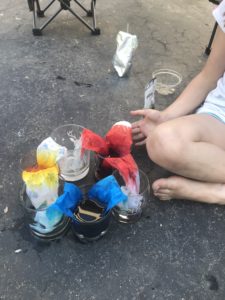
Watching the magic happen


8. Place one half of a rolled paper towel in the 1st cup and place the other half in the cup next to it. Then another paper towel from 2nd cup and into the 3rd cup.

Color is traveling with the paper towel

Watching the color travel within the paper towel!

9. Continue until you have placed the last paper towel that drapes over from the 6th cup to the 7th cup.

Now the fun begins! Watch the cups! You should see the colored water begin to crawl up the paper towel. 

**Because I completed this with little ones, we set a timer and checked in on the experiment every three to five minutes to see the changes! 

Do you have a favorite activity you would love to share with us? Share it in our comments! We would LOVE to hear from you! 


Wait-there’s More!

If you’re looking to expand on the water absorption theme or just looking for simple summer activities…check out some of our top activities here: 


We LOVE, LOVE, LOVE to hear from you! Leave us a comment below! 

5 quick ways to simplify

3 AWESOME Water Play Learning Activities!

Water Beads are SO Fun!

So I’m not sure if it’s the “teacher blood” coursing through me or if it’s purely my own love for teaching and learning but, without fail, each time we find something for our kiddos to experiment with I’m always trying to find a way to turn it into a learning experience. In this case, I stumbled upon these “Dew Drops” (aka Water Beads) recently and they are FAN-TAS-TIC! Not only are there PLENTY of beads for the price…they also come complete with marine life creatures–PERFECT for teaching while playing! Yay! Whether you’re seeking a teaching opportunity or are just looking for some “cool down time” this summer…these activities are right up your alley! 

P.S.: There are Affiliate links associated within the ideas below! I receive a commission from such links…you can read more about that here in our Disclosure page.

Check out this printable for an easy step by step mini lesson: Water Absorption and Marine Life Lesson Plan with Worksheet!

As a quick hint for “teaching” these activities with your little ones: 

  1. Start by discussing water absorption with the sponge water absorption activity below! 
  2. Choose one of the books below on water absorption and/or the ocean to read aloud!
  3. Lead into water play with the water beads and marine life! The kiddos can explore/discuss water absorption as the beads take on water AND they can explore the marine creatures  to the books you read about them! 

Here are those awesome activities I was describing: 

COOL Ocean Water Beads with Marine Creatures


Dew Drop or Water Beads

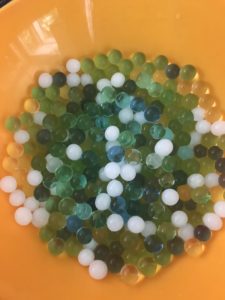
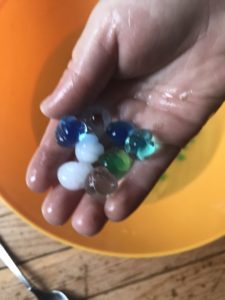
After approximately 3 hours of absorption…

Water Beads

The beads are actually hard when you get them…and sooo tiny!

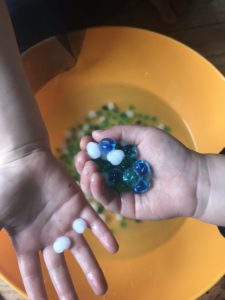
This is an AWESOME find! While the water beads take some time to absorb water (very similar to those “grow animals” you can “hatch” in water…the package says it will reach full absorption around 8 hours), we were still able to see changes in the beads fairly quickly. We also played with them plenty as they grew!  The water beads are cool to the touch and are an amazing sensory activity!  

Not only do these beads  last a LONG time and provide countless hours of sensory fun for all ages, BUT they include marine animals as well! If you’re planning a trip to the aquarium this summer, you can easily                                                                  complete this activity as a precursor to that trip!


Next Day! So Fun!


Science Connection:

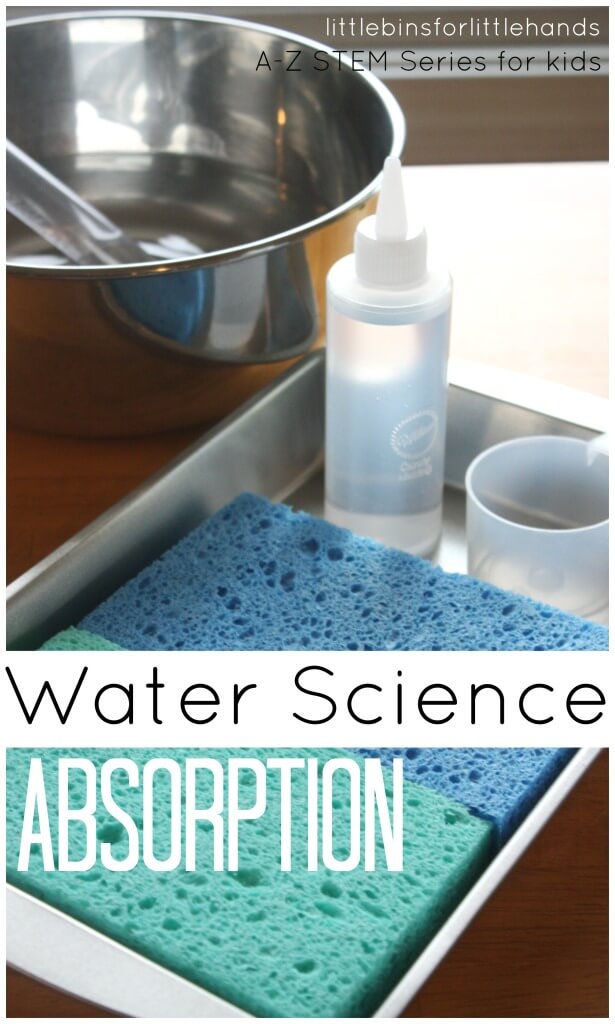
Pair this activity with a brief discussion about absorption! Use sponges to demonstrate how certain materials “soak up” water and expand when water is taken in!

Here’s a visual/tutorial  on how that might look from littlebinsforlittlehands

Absorption Science for Kids STEM activity Water Science Experiement


Here’s the “teacher-speak” background info about absorption:

Sponges are made of loose fibers with lots of space between them. The holes between the sponge fibers absorb the water, and so the sponge material swells up with water. This stops the water coming out of the sponge when you lift it out of the water. When you squeeze the sponge you are forcing the water out of the holes in the sponge.

A wet sponge will absorb more than a dry sponge as water molecules are highly attracted to one another!


Book Pairing Opportunity: 

Pair this activity with these books on marine life and absorption to create your own mini lesson! 

Here are some AWESOME titles our families love: 

These pages actually MOVE as you turn them! The images “come to life” and include a description of each animal featured. 

If you have a mini oceanographer, this book is for YOU! Filled with stunning photography and facts on every aspect of ocean life, this is a book that WON’T get put down! 

We own a few of these AWESOME “First” books from National Geographic and we love them! This book about the ocean features 100 adorable animal photos  facts about the creatures’ sizes, diets, homes, and more. 

The REAL creature’s from Disney’s Finding Nemo/Finding Dory are featured in this book! All captured with beautiful underwater photography and cool info about our oceans! This book includes fascinating facts, maps, and marine conservation tips and efforts. 

Adorable book that explains the usefulness of water! Step 1 Scholastic Reader. 

Wrapping Up: 

Whether you’ve decided have fun with water one day or you have a set plan in mind, remember that genuine teaching happens almost spontaneously! Let your kiddos be the “drivers” for any learning activity and it’s bound to go  far! 

Below are some are the resources we mentioned earlier! Have fun and if you have any questions or suggestions…we would LOVE to hear from you! 

Teaching Suggestions for this Activity! 

  1. Start by discussing water absorption with the sponge absorption activity below! 
  2. Continue your discussion about absorption with water beads and the miniature marine life creatures! The kiddos can explore/discuss water absorption as the beads take on water! The miniature marine life creatures will spark conversation naturally! 
    • Kids can select one of the marine animals from the figurines then pair it with one of the books featured above!   
  3. Choose a book from above to pair with a selected marine animal or have your kids select by just their own interest!
  4. Wrap up with an awesome trip to your local aquarium or a day at the beach! 

Don’t forget this awesome FREE printable on these activities: Water Absorption and Marine Life Lesson Plan with Worksheet!


Excellent Easter & Spring Crafts!


Easter and Spring

Spring has sprung!

It’s official, spring is here! While Mother Nature may be singing a different tune, (hello New England snow), yesterday officially marked the first day of a new season and with it, of course, comes new crafting, learning and decorating opportunities-YAY! I absolutely LOVE decorating for a new season or holiday…and the BEST part is…so do the kiddos! I use every opportunity imaginable to let our kids change over the décor in the house in celebration for the newest season. They love making crafts, looking through bins to find crafts from the year prior, and finding new ideas to create items for the house! Honestly, kids are so super creative, that I’ve learned to let go of my “gotta control the perfection” bit in lieu of adorable kid décor. IT’s amazing! Our kids get so excited to see their art work or crafts adorned all over our house; it’s super fun!

In preparation for this season of “newness”, we’ve located some amazing crafting/learning opportunities (that double as awesome decorating ideas) to share with all of you (double YAY!)

Whether you celebrate Easter, Passover or the entering of a new season, we have you covered with five of the most adorable ways to teach, celebrate and decorate the start of this awesome, new season.

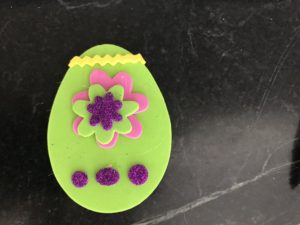
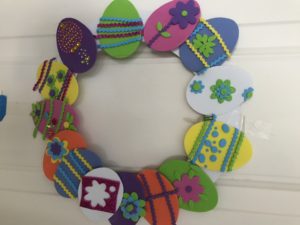
Easy-Peasy Foam Eggs

Easter and Spring Crafts!

Easter and Spring Crafts! Foam Eggs-created by your littles!

Want an adorable way to celebrate Easter and spring? Try creating eggs using foam pieces or find a kit with all of the goodies already created for you! Here are some fun ways to create AND decorate:

What you will need: (affiliate links below)

        • Foam pieces to cut out the egg shapes
        • Glue sticks
        • Cute Foam Shapes such as these:

IF you’re super short on time or just excited to dive in and leave some of the cutting to someone else–here’s another option for you (this is exactly the one I purchased last year–it lasted me until this year!)

Here are two other kits that come with everything you want to create and decorate:


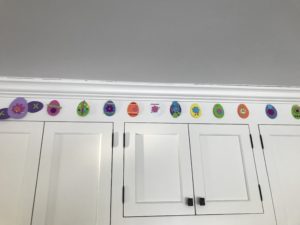
From there we just got down to decorating our eggs! We made a wreath and used extra eggs to make a decorative banner above our plain cabinets! So fun!

Excellent Easter/Spring Crafts!

Decorate for Easter and Sprig

Spring-up those boring spaces with kid art!


Why We LOVE this

Why We Love This: A Plethora of Teachable Moments


  • Builds fine motor development for littles learning how to use scissors or apply intricate, decorative pieces.
  • Offers the chance to for children to express creativity (check out the “flying egg featured above left).
  • If teaching colors, it provides a great sounding board to discuss the different colored eggs.
  • If teaching counting, how may eggs do you see? How many green eggs? Yellow eggs?
  • Teaching patterns-use different designs to create patterns such as: polka dots, lines, polka dots, lines.
  • Discuss/show animals that hatch from eggs (chickens, snakes, other birds, turtles).

More adorable crafts: for Easter or Spring–Whatever your Thing!


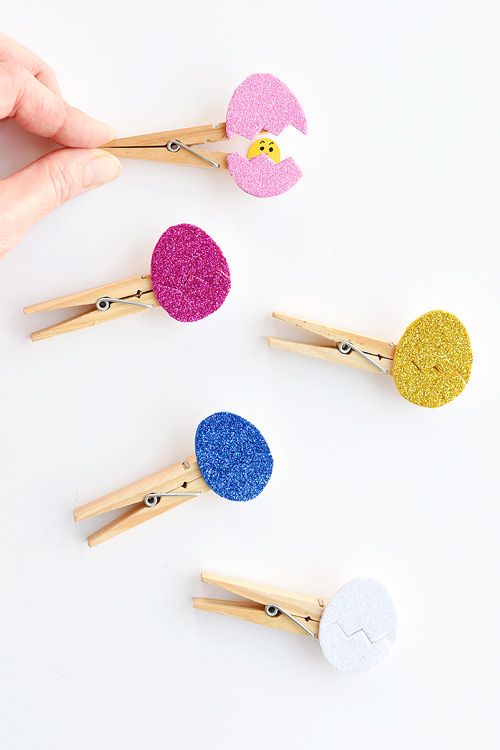
Peek-a-boo Clothespin Eggs from One Little Project at a Time:

How cute are these? One Little Project gives an easy tutorial for creating these adorable eggs!

Want to check out this tutorial? Here’s the link! http://onelittleproject.com/peekaboo-clothespin-eggs/

Peek-a-boo Clothespin Eggs

These peekaboo clothespin eggs are so easy to make and they look SO CUTE! Each one takes less than 5 minutes to make and they look adorable! They're an awesome low mess craft idea and are such an adorable Easter craft idea!! My kids loved seeing the surprise chick inside the egg!

peekaboo eggs from:http://onelittleproject.com/peekaboo-clothespin-eggs/


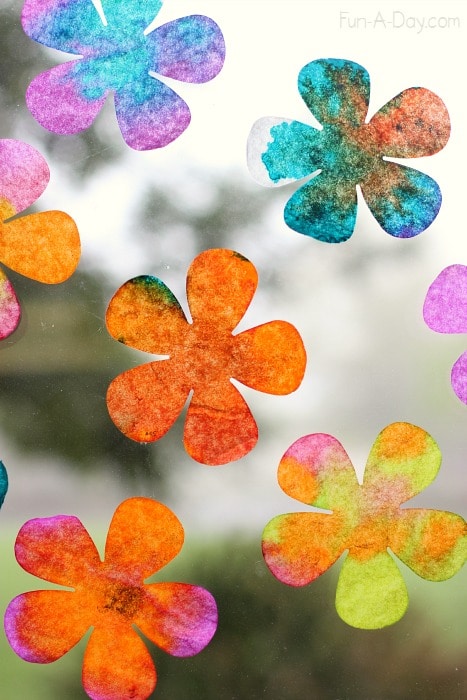
Science and art fun with coffee filter flowers


Science meets Art and Spring:

Coffee-Filter Flower Water Color Craft!

Awesome idea found on fun-a-day: https://fun-a-day.com/colorful-science-and-art-experiment-for-spring/#comment-179649

Two years ago, I explored the concept of chromatography with our, then, four year old budding scientist. Flash-forward two years later and she ABSOLUTELY can’t get enough of science or chemistry! You can bet this project from fun-a-day is on our list this week!

This great project combines art and science all within an AWESOME spring theme! Exploring color and how they combine to create other colors is just one awesome learning tool that you can go over with even your littlest of learners!

Why We LOVE this

Why We Love This:

The combined learning, hands-on fun! Fun-A-Day breaks down other learning possibilities with this such as:

  • Color absorption (rates of absorption)
  • Saturation
  • Fine Motor Skill Practice-using eye droppers

Other awesome reasons to love this crafty learning experience:

  • Accessible to younger learners–I’m not afraid to try this with our three-year old!
  • Can be easily modified for older budding scientists.
  • Simple to access supplies! I’m actually trying food coloring with this first, then the watercolors!


 Catch that Caterpillar Craft!

15 Very Hungry Caterpillar Crafts for Kids

Adorable clothes pin caterpillar found on teachingmama.org can be created after reading the Very Hungry Caterpillar, (affiliate link below) by Eric Carle, or you can create your own multi-colored caterpillar using a clothespin! (more to come here!)


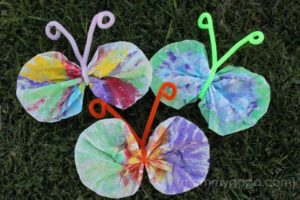
Colorful Coffee Filter Butterflies!

Find this fun idea on Honey & Lime: http://www.honeyandlime.co/2012/03/spring-crafts-for-kids-coffee-filter-butterfly-craft.html

Yes…I’m one of those peop that if I have already bought coffee filters for one fun project, why not keep it going? What’s spring without a mini-lesson on metamorphosis? Well-stay-tuned! Aside from this adorable craft from Honey & Lime below, we have a book recommendations and a way to take this spring learning experience to the next level!

This adorable craft can be created on a separate day as your caterpillar craft or on the same day!

All you really need to transform a caterpillar into a butterfly can be found on Honey and Lime! White coffee filters, paint and pipe cleaners!

Wrapping it Up:

For these spring-inspired ideas, our kiddos took center stage! Most of these ideas are Pinterest inspired but instead of searching, you can always stop by here to grab some quick go-to ideas (rather than searching yourself!). All of these crafts are great to use for learning, crafting, and decorating–a win, win, WIN in my book any day! Stay tuned for some add on ideas to the caterpillar theme!


Saint Patrick’s Day Learning Fun!

With the month of March living up to it’s “in like a lion, out like a lamb” motto, I was quickly searching for some additional Saint Patrick’s Day learning fun to eat up time after snow-day activities wrap up. I found it took me a little bit of time to go through all of those awesome pins and posts for the next, (and arguably -by my husband’s criteria-most fun), holiday in the line up leading to Easter.

While celebrating the luck of the Irish, (Irish or not), we’ve nailed down some adorable crafts combined with learning that surely aim to please!

Hands on Learning Age Preschool and Up! 

http://www.growingajeweledrose.com/2016/02/kids-science-for-st-patricks-day.html?utm_source=feedburner&utm_medium=feed&utm_campaign=Feed:+blogspot/VvbGJ+(Growing+A+Jeweled+Rose)

Handprint Rainbow

Handprint Rainbow Keepsake by The Logans

Hand Print Rainbow:

Have littles learning their colors? What better way to talk about the legends associated with Saint Patrick’s Day than to incorporate making their own rainbow and “pot of gold”? Not only is it fun, you can put it in a sheet protector or laminate it and have it for years to come !

BONUS Activity: Do you want a way for your kiddos to reflect on how lucky or blessed they are this St. Patrick’s Day? Put gold coins out for them to add what they feel “lucky” for. You can ask your little ones what is so special in their lives that they love! Then write it down on a gold coin like this:

Awesome learning~ OUTSIDE THE BOX!

Saint Patrick's Day Learning Fun!

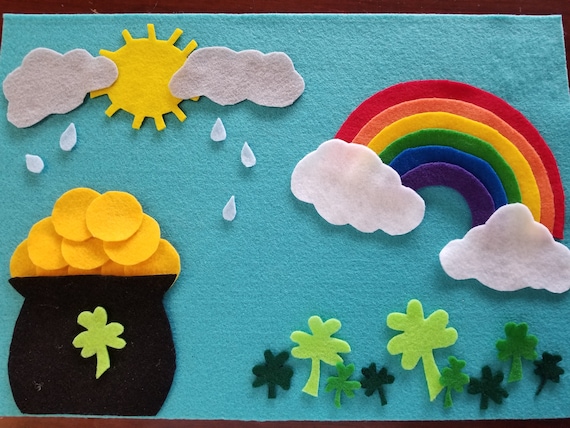
St. Patrick’s Day Learning Felt Activity from The Teaching Mamas:https://www.etsy.com/listing/586480850/st-patricks-day-felt-board-fun?ref=shop_home_active_1

Want to pull off some awesome hands-on learning activities but find that your day just seems to slip away from you? NO WORRIES! The Teaching Mamas, a new and upcoming store filled with AMAZING hands-on learning opportunities, has the perfect solution!

This awesome Saint Patrick’s Day themed box can be used throughout this month leading into spring!

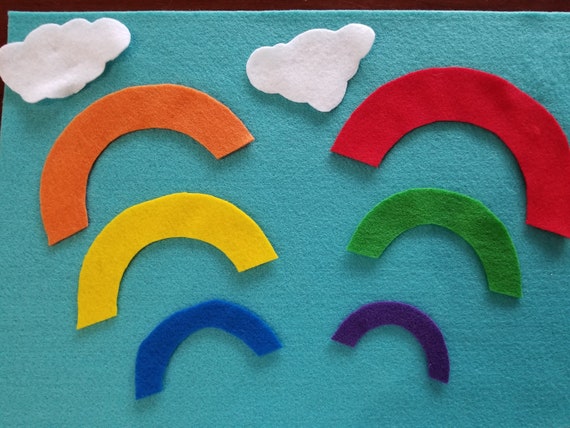
Teach Colors with Felt!

Teach Colors with Fun Felt!

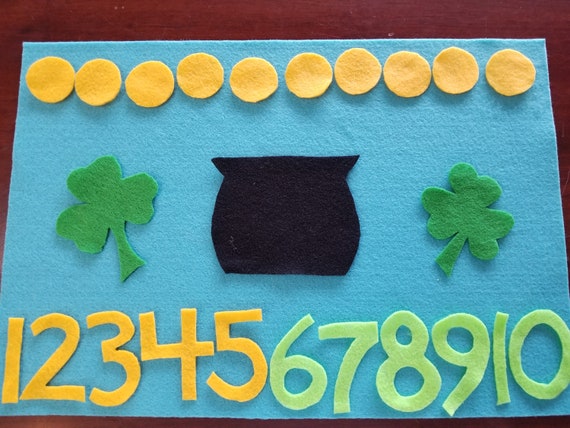
Teaching Numbers

Teach numbers using felt coins!


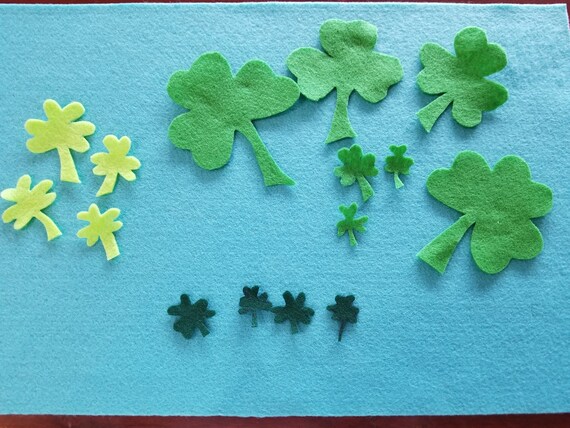
Counting Fun with Clovers!

Counting Fun with Clovers

Counting Fun!

Counting Fun with Gold Coins!


Why We LOVE this

Why We Love This:

  • Multiple teaching opportunities: colors, numbers, and fine-motor skills
  • Inexpensive: Only $15.00 on Etsy!
  • Learning board can be used over and over again.
  • Kiddos LOVE felt–the soft feel, bright colors, interchangeability, AND the fact that you could apply other felt activities to this one!

Link to purchase: https://www.etsy.com/listing/586480850/st-patricks-day-felt-board-fun?ref=shop_home_active_1

Religious Focus for Saint Patrick’s Day: I found this AWESOME packet on TeacherspayTeachers:

St. Patrick's Day Bible Activity Pack

Grab it here:https://www.teacherspayteachers.com/Product/St-Patricks-Day-Bible-Activity-Pack-3026510

St. Patrick's Day Bible Activity Pack

Why We LOVE this

Why We Love This:

Cost: SUPER INEXPENSIVE! ONLY $5.00!

*Extremely easy download–after purchase it took me about 2 minutes to complete

*Great for littles (age 2+) all the way through Grade 1

*Multiple Activities! This pack includes coloring pages, mazes, a shamrock craft to create highlighting the Trinity and much more!


I've read that everyone's Irish on St. Patrick's Day, so we show show our lucky side with awesome homemade slime. Our last name is Irish, so of course we had to make a St Patricks Day slime recipe this year. Our St Patricks Day slime is a fun activity for science and sensory play all in one!

Saint Patrick’s Day Slime!  

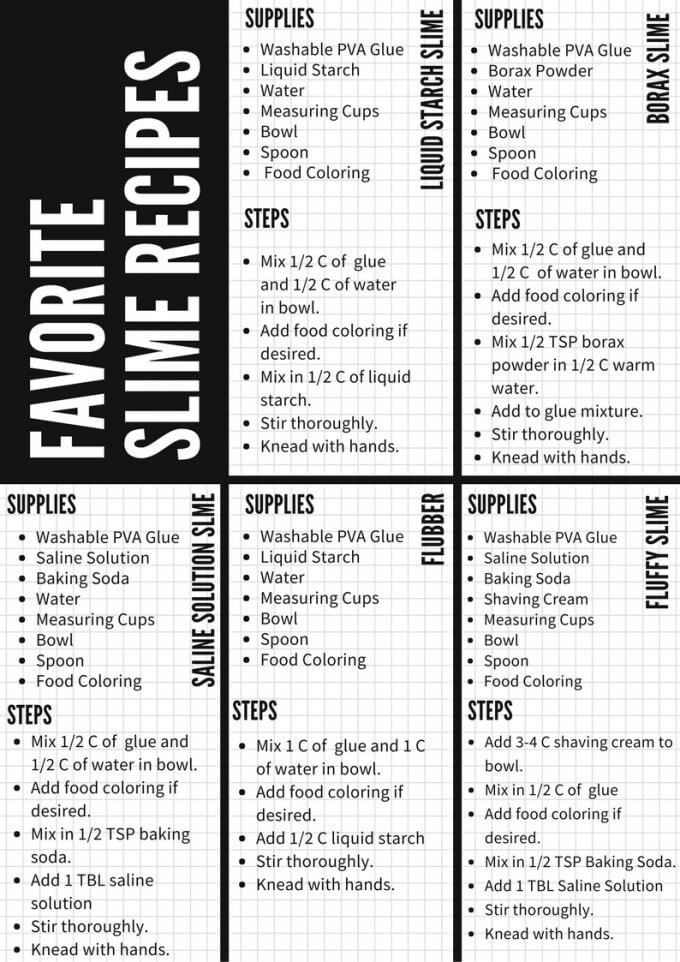
What’s more fun than creating slime? It’s an activity EVERYONE LOVES!  FOUR SIMPLE recipes to do so!  This awesome website: Little bits for Little Hands gives you the run down: https://littlebinsforlittlehands.com/st-patricks-day-slime-recipe-holiday-sensory-play/

This awesome site gives you four different ways to create that “can’t get enough of” slime!

  1. Fluffy Slime with shaving cream
  2. Borax Slime!
  3. Liquid Starch Slime!
  4. Saline Solution Slime!

Below are the recipes provided on Little Bins for Little Hands:


Letter Learning FUN Name Game!

Learning thise letters

Inspired by our littlest guy, this letter learning name game is fun to make and play! Here’s a little background history on this game: Our daughter knew her letters before the age of two.I mean–not even just knew the “big” letters (capitals), she knew how to distinguish between “big A” and “little a”. She is our little “sponge”, soaking everything up and loving learning since she was born!  Science, Math, Language Arts–you name it, she can’t get enough! We used sign language early on and graduated to lettered blocks, flash cards, tracing and independent writing as she was deciphering letters and letter sounds. She was definitely happy with any teaching method we presented-traditional or non.

Moving forward, we knew with our littlest guy,who also loves learning-(what child doesn’t?!), that we needed to take a little bit of a different approach to teaching and learning. Honestly, I was psyched about investigating other ways of presenting ideas to him (like letters/letter sounds), because I love discovering new ways to teach!  In my search for something that would connect well with his interests,I stumbled upon an idea and turned it into our very own fun letter learning name game! Here it is:


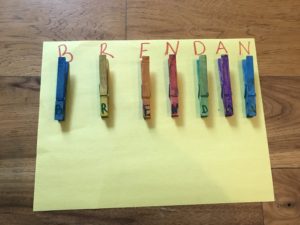
Fun. easy DIY letter game

Letter Learning Name Game!

Letter Learning Name Game!

Learning Goals:

  • Practice letter recognition
  • Letter sounds
  • Letters associated with their name
  • Practice fine motor grasping skills

Age range: This game IS fun for all ages with supervision! However, it may be a bit redundant for children over the age of 5 or if the child already knows how to spell their name and knows their letters.

Supplies you will need OR can easily purchase below:

To create the close pin letter game pieces:

      1. Close pins (larger ones not the mini ones)–enough for the letters in your child’s name or the whole alphabet
      2. Acrylic Paint or washable water color (unless the close pins are already painted–see option below).
      3. Marker or pre-printed letters to adhere to the close pins
      4. Modge Podge–a crafters favorite!


Supplies for the “game board”

Please remember these are just ideas! If you think of something else, we would love to hear from you so we can post it and add on!

  • Pre-printed letters OR a marker to simply write the letters down.

Ideas for material to use as the base for your game board:

  • Construction paper-(to add letters)
  • Paper Plate (also a base for the letters)
  • Stock paper

Additionally ADORABLE IDEA:

Ask your kiddos to get involved in the creation of their board game: Have kiddos cut/create the board game using one or more of the materials above into a shape of something they love-shape of a truck, animal, a basketball or baseball…you name it!

Steps for Creating these Easy Letter Learning Name Game Pieces: 

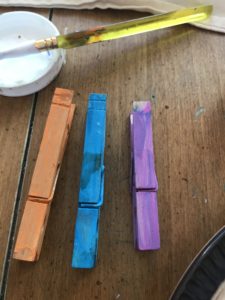
Painted Close Pins Ready for Mod Podge!

***There are affiliate ads present below!***

Step 1: Painting

If painting: paint all of the closepins with two separate coats. Let dry.

Step 2: Mod Podge


  • Add one coat of Mod Podge to seal the paint.
    • Tip: Paint on Mod Podge thinly, careful not to over paint it as it will dry in clumps.

Step 3: Letters 

  • After the Mod Podge is dry, add letters with Sharpie Marker OR pre-printed letters.
  • Allow Marker to dry or letters to stick onto close pins.

Step 4: MORE Mod!

  • Add one-two more coats of Mod Podge, allowing each coat to fully dry before adding another.

Game Time!

First: we played with the close pins, opening and closing them. We also reviewed the letters we were using by calling each one out on both the close pins and the game board!

  1. Simply calling out the letters to see who can find them and attach them to the right spaces.
  2. A timed/see whose faster game where each person (adult and kiddo or kiddo versus kiddo) takes their game boards and yells out each letter the find as they quickly scramble to see who can “build” their name first! ***
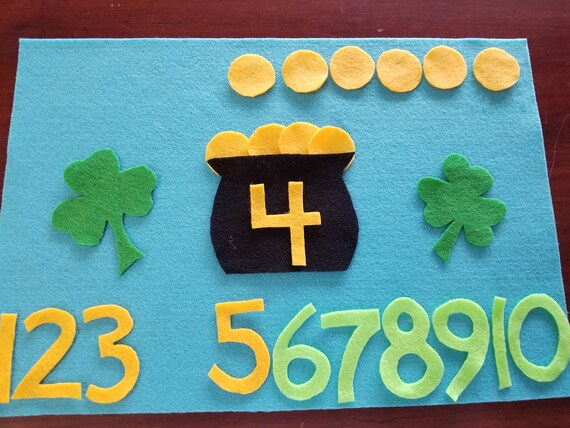
**For the second game option–we did this one after much practice with our little guy. He needed to learn the letters and feel secure before the fun of timing it took place! Let me tell you, though, once we timed it, he wanted to play over and over again!